*post was written under previous alias; Blossom & Cake
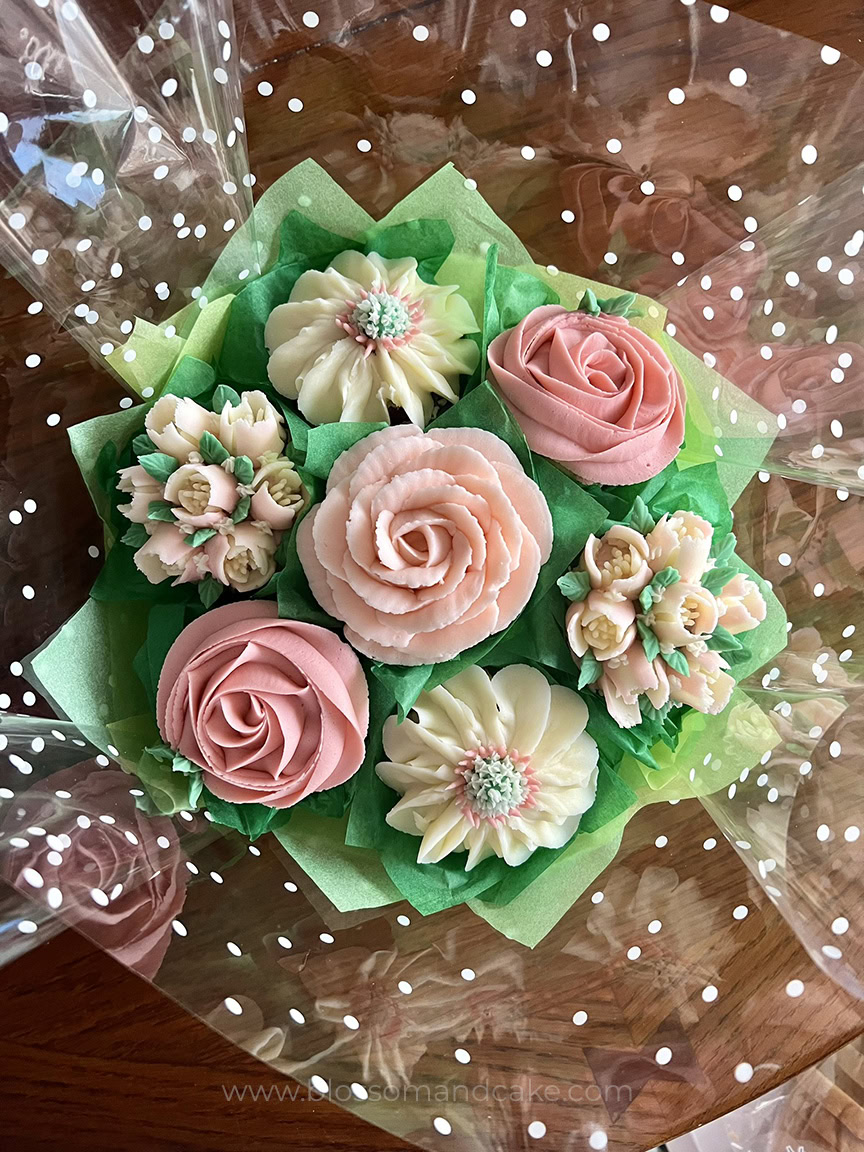
A cupcake bouquet is the perfect way to elevate your buttercream flower creations! In this step-by-step tutorial, I’ll show you how to transform your beautifully piped flowers, into a floral arrangement that looks just like a real bouquet…only you can eat this one!
Cupcake bouquets are not only visually intriguing, but also make the perfect gift for birthdays, weddings or other special occasions such as Mother’s Day. With a few simple tools and some assembly techniques, you’ll have a professional-looking bouquet in no time!
If you followed last week’s tutorial on how to pipe buttercream flowers: hydrangeas, rosette and rose, you’re already halfway there! In this post, I’ll guide you through arranging your flowers using plastic cups, tissue paper and decorative cellophane, to create bouquet that’s practical as it is beautiful. Let’s get started!


Jump To:
Video Tutorial
What You’ll Need
- Decorated cupcakes
- Square sheets of tissue paper (5×5 inches, 2 per cupcake)
- 10-12 inch square piece of tissue paper (to wrap the outside of the bouquet)
- Slightly larger square of cellophane (14-16 inches, to wrap the entire bouquet)
- Paper or plastic cups (7 oz size works well)
- Stapler
- Tape
- 6-inch cake board (for support and wrapping tissue around the bouquet)
- Toothpicks

Prepare the Flowers
Just another reminder: if you missed last week’s tutorial on piping the hydrangeas, rosettes, and rose featured in this bouquet, be sure to check it out here for step-by-step instructions and tips.
For your 7-flower bouquet, feel free to choose whichever flowers you like! You can use the hydrangeas, rosettes, and roses from the previous tutorial, mix and match with other designs, or stick to one type of flower for a cohesive look. The possibilities are endless, so let your creativity shine!

To ensure your bouquet looks cohesive and polished, here are a few quick tips:
- Flower sizes: pipe flowers of consistent size for balance but feel free to vary a few for a more natural look
- Color palette: stick to a coordinated color scheme to create a harmonious design. use similar shades or dual-tone (two-tone) piping for added depth.
- Practice: practicing your flowers beforehand on parchment paper can help you perfect your technique and ensure uniformity.
Step-by-Step Guide: Assembling Your Cupcake Bouquet
Prepare the Cup Holder Base
- Staple the cups together:
- Take one cup and position it so the rim of a second cup sits underneath the rim of the first.
- Staple the two cups together as far down as your stapler will reach.
- Take a third cup and position its rim above the second cup but below the first cup.
- Continue this pattern, working in a circular shape until you have six cups arranged around a center cup.
- Ensure stability:
- The cups should form a dome shape and stand upright without wobbling. If they feel loose, add more staples to secure the structure.
- Attach the base:
- Use tape to attach a 6-inch cake board to the bottom of the cups. This will provide added stability and make it easier to wrap the bouquet later.

Wrap and Arrange the Cupcakes
- Wrap the cupcakes with tissue paper:
- Take two 5×5-inch tissue paper squares and stack them slightly off-center, staggering the edges so there are eight visible corners instead of four.
- Place a cupcake in the center of the tissue paper stack.
- Gently wrap the tissue paper around the cupcake, ensuring it covers the sides.
- Insert cupcakes into the cups:
- Start with the center cup, or begin wherever you prefer. Make sure to offset the weight as you go to prevent the arrangement from tipping over.
- Place the wrapped cupcake into the cup and secure it by gently pressing a toothpick through the tissue paper into the cupcake. This will help anchor it in place.
- Continue wrapping and arranging:
- Repeat this process for all the cupcakes, wrapping and placing them into the remaining cups.
- If using flowers from a previous tutorial, arrange the cupcakes so that matching designs (e.g., roses or hydrangeas) are opposite one another for a balanced look.

Final Touches
- Fluff the tissue paper:
- Use a toothpick to gently fluff out the tissue paper around each cupcake. This will help cover any gaps and give the bouquet a fuller, more polished appearance.
- Wrap the entire bouquet:
- Lay the cellophane flat on the table and place the larger tissue paper square on top of it.
- Position the cupcake arrangement in the center of the tissue paper and cellophane. Use double-sided tape between the tissue paper and the cellophane to prevent them from shifting as you wrap.
- Starting with one corner, lift the cellophane up toward the cupcakes. Using your other hand, gently push the cellophane under itself and tape it to secure.
- Repeat this process for the other three corners, keeping the cellophane tight around the bouquet. If the wrapping process seems tricky, refer to the YouTube video tutorial for a clear visual demonstration.
Your cupcake bouquet is now complete!

Tips for Transporting Your Cupcake Bouquet Safely
- Place the bouquet in a cake box; a 10×10-inch box fits the 7-cupcake bouquet well.
- Ensure the box is on a flat surface in your vehicle to prevent tipping. Also in a snug area to prevent it from sliding around.
- Support the bottom of the bouquet with one hand while carrying it to prevent shifting, damage, or the box breaking and the cupcakes falling out.
Conclusion
And tada- a beautiful cupcake bouquet! By combining your piped buttercream flowers with a few simple assembly techniques, you’ve created an edible arrangement that’s perfect for gifting or displaying at any event.
If you enjoyed this tutorial, be sure to check out the real-time assembly video on my Youtube channel, for a closer look at the process. It’s great to follow along and see exactly how to bring your bouquet to life!
I’d love to see your cupcake bouquets, so don’t forget to share your creations on social media and tag me @alchemy.sweets. If you haven’t already, subscribe to my blog and Youtube channel for more decorating tips, tutorials and inspiration.
Stay tuned for next week’s post, where I’ll share even more creative ideas to take your cupcake decorating to the next level.
Happy decorating!


