*post was written under previous alias; Blossom & Cake
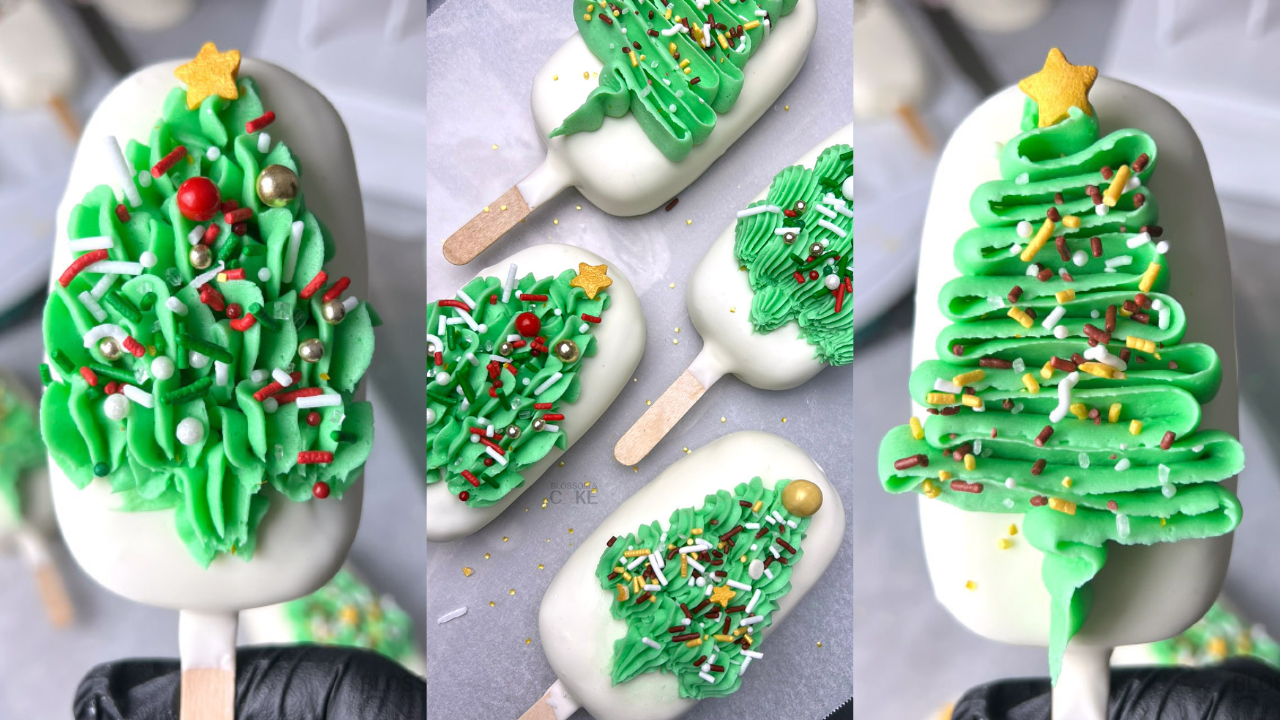
Learn how to pipe simple buttercream Christmas trees on cakesicles! Buttercream trees are one of my favorite ways to decorate cakesicles for the holidays—they add dimension and texture that you can’t get with just candy melt drizzles. Plus, the piping techniques you’ll learn here translate to so many other decorating projects.
In this tutorial, I’ll show you two different methods: the ribbon tree technique using a flower petal tip for an elegant, flowing look, and the shell piping method using star tips for a more textured, classic Christmas tree. I’ll walk you through three different star tip options so you can see how each creates a slightly different effect and choose your favorite.
Both techniques are beginner-friendly once you understand the basic piping motions. The best part? These trees are forgiving—a little imperfection just makes them look more like real trees! Let’s get started.
Table of Contents
Supplies
- Cake
- Cakesicle mold
- Candy melts
- Food dye
- Medium consistency buttercream
- Piping Bags
- Piping Tips; ones used in these photos:
- Wilton 104
- Wilton 33
- Wilton/Ateco 17
- Wilton 32
- Sprinkles
Making & Dipping the Cakesicles
For this festive design, I’m piping buttercream Christmas trees on cakesicles. Need help making and dipping cakesicles? Check out my complete cakesicle tutorial here
Quick summary: Mix crumbled cake until it forms a ball, press into molds, insert sticks, chill, unmold, dip in melted candy melts, and let set before decorating.
Once your cakesicles are dipped and set, you’re ready for the fun part—decorating!
Ribbon Trees
How to pipe a ribbon
We are piping a ribbon using a flower petal tip, which are shaped like a tear drop.
- Position the tip on the surface with the teardrop facing downward, and the narrow end oriented upward.
- Apply medium pressure and pull right or left to create a line.
- Upon reaching the end of the line, pause and apply pressure to form a loop, subsequently initiating a line in the opposite direction below the initial line.
- Continue doing this until you’ve cover the entire surface
- At the end, pause, release pressure and pull away.
Making the ribbon tree
To ensure that your lines/rows are oriented upright, hold the tip anywhere between a 10-20 degree angle. For the design below, I am using a Wilton 104 tip.
- Position your tip at an angle in the center top of your cakesicle
- Pipe a ribbon as described earlier, but make your first line very small.
- Gradually make your lines longer as you work your way down the cakesicke.
- To finish, go to the center of the last line and continue the line down towards you.
- Release pressure and pull away.


Shell Trees
How to pipe shells
- Hold bag at a 40-45 degree angle with tip hovering slightly above the surface.
- Squeeze with enough pressure to release a generous amount of buttercream, this should cause your tip to move up.
- Gradually release pressure as you lower the tip down, and toward you until the tip touches back down to the surface.
- Release pressure completely and pull the tip to form a point.
Making the shell tree
- Start by piping a shell at center top of your cakesicle.
- Make a second row of 2 shells below that overlap the point of the previous shells, each slightly off center of the first shell.
- Next do a row of 3. Keep following this pattern, increasing your row size until you’ve gone the entire width of the cakesicle or until your tree is as tall as you’re wanting.
- Using the same tip, gently press into the middle of the bottom row, add pressure and pull down to create a tree trunk.
- Release pressure completely and pull the tip to form a point.
- Decorate your tree with edible glitter and sprinkles to give it that festive charm.
Pro tip: As you create each shell, be mindful of the spacing and consistency in size; this will ensure that your tree has a uniform appearance.
Shell examples; 3 different tips
5 Prong Closed star tip
I have no clue where the piping tip I’m using here came from; it’s got a “5” engraved on the side but nothing else to identify it. Honestly, this number confused me at first since this is a closed star tip, and usually, a “5” means a round tip, right? However, I think in this case the “5” is in reference to the amount of prongs it has. So with that being said, I’d say it’s a replica of the Wilton 33, which is a 5 pronged closed star tip. It gives a similar effect to a Wilton 2D tip…just smaller and one less prong.


6 Prong Open Star tip
Below I used an Ateco 17 tip to create the shells. This tip is a mini version of a Wilton 1M, a very popular large star tip.
I did two rows of 5 shells on this one, as a row of 6 would have been too wide…but these shells were too petite and didn’t have enough volume.


12 Prong Open star tip.
The most classic of tips to make shells with! Here I used a Wilton 32, which is an open star tip that allows you to create these small shells. This particular tip is a favorite of mine because it makes perfectly defined shapes every time.


Troubleshooting Tips
Buttercream melting or sliding off the cakesicle? Your buttercream is too warm, or the candy melt coating is still slightly soft. Make sure your cakesicles are fully set and your buttercream is at a cool room temperature before piping.
Shells won’t hold their shape? Your buttercream is too soft. Add a bit more powdered sugar or chill it for 10 minutes, then re-whip before piping.
Ribbon tree looks messy or uneven? Check your piping tip angle—it should be tilted 10-20 degrees so the rows stack upright. Practice the ribbon motion on parchment paper first to get the feel for consistent pressure.
Sprinkles or glitter sliding off? Wait for the buttercream to set slightly (about 5 minutes) before adding decorations, or they’ll just fall right off.
Trees looking too small? Use slightly more pressure when piping shells to create fuller, more voluminous shapes. The Wilton 32 tip tends to give the best definition for small shells.
Packaging Your Cakesicles
I got several questions about packaging after sharing these on TikTok, so here’s what works well for buttercream-decorated cakesicles.
Since these are decorated with buttercream rather than chocolate or candy melts, you’ll need to use boxes instead of cellophane bags. The buttercream needs protection to avoid smudging and squishing. I found a standard cupcake box without the insert works best for cakesicles. You can fit them pretty snug so they won’t move around while transporting. You can put the cakesicles on large cupcake or pastry liners, or lie them on a bed of food safe tissue.


Alternatively, you can use individual cakesicle boxes if the decorations don’t have too much height. Amazon has a few options, just make sure you find ones that have the popsicle stick hole and not the lollypop hole. The buttercream Christmas trees in this post are too tall for individual cakesicle boxes and would likely get smashed. Individual boxes work great for flatter chocolate decorations though.
Happy Decorating!
Modified: December 4, 2025