*post was written under previous alias; Blossom & Cake
Learn how to decorate winter wonderland cupcakes with these step-by-step tutorials. Winter wonderland cupcakes are all about creating that magical, snowy, elegant aesthetic—think cool blues, pristine whites, and shimmering silver. These designs are perfect for winter birthdays, holiday parties, baby showers, or any celebration that needs a touch of frosty elegance.
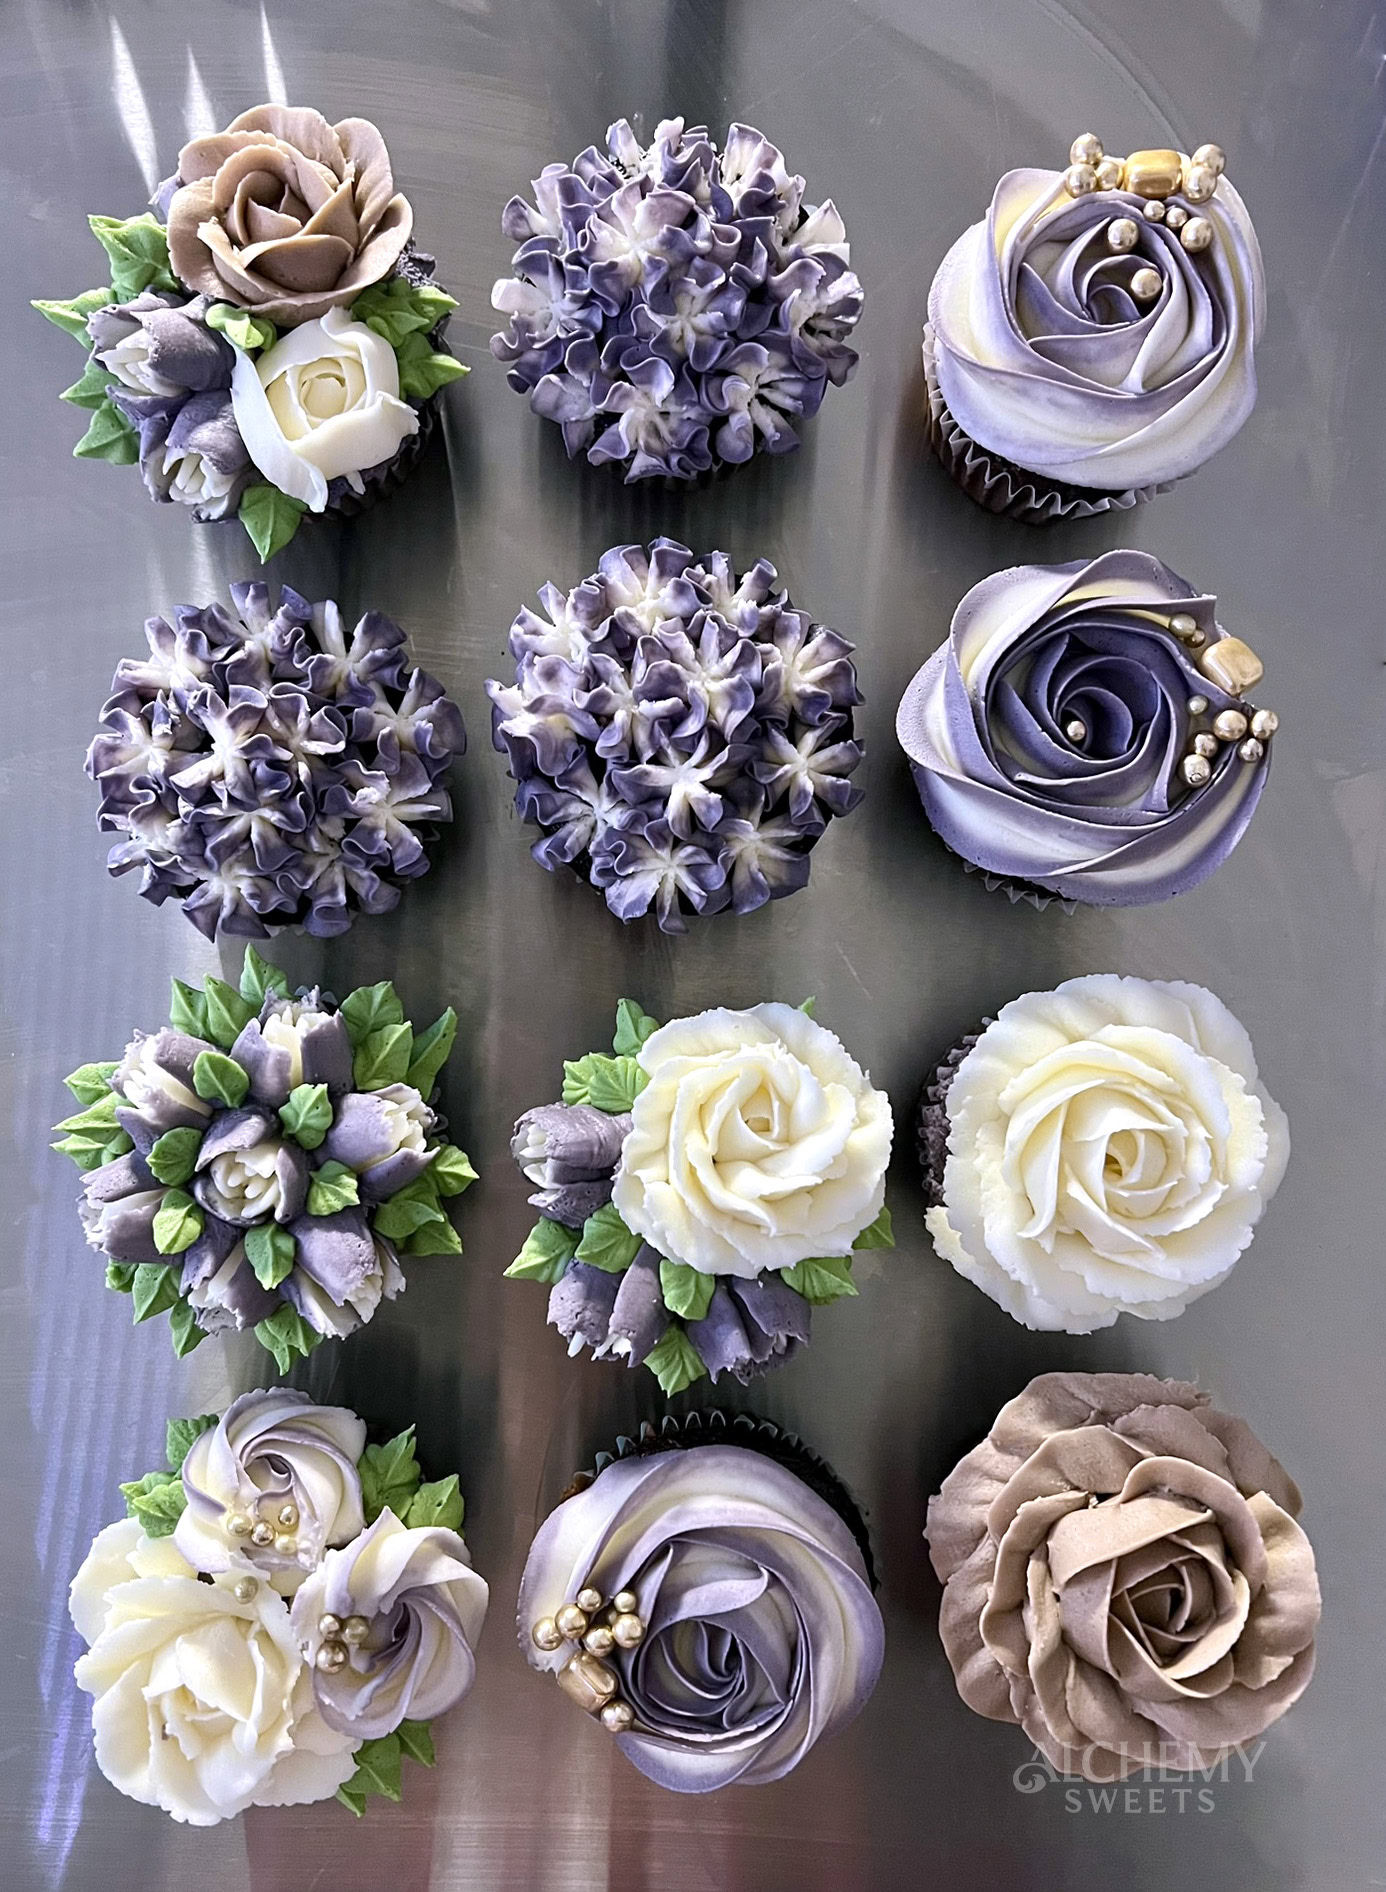
What I love about this collection is how versatile it is. I’m showing you five different designs using only three piping tips (Wilton 2D, 4B, and 32), so you can see how much variation you can create with minimal tools. Each design uses rosettes, stars, shells, or zigzags in different combinations, giving you endless possibilities to mix and match.
The candy melt snowflake transfers add that extra wow factor and are easier to make than you might think. Once you master these techniques, you’ll be able to pipe dozens of cupcakes quickly and make them look bakery-perfect every time.
After piping these, you will be a rosette champ!
Table of Contents
What Youll Need
- Your choice of cupcake
- Piping Tips:
- Wilton 2D
- Wilton 4B
- Wilton 32
- Piping bags; one for each color
- Medium consistency buttercream
- Food dye
- Candy melt snowflake transfers
- Sprinkles
Candy melt snowflake Transfers

Candy Melt Snowflake Transfers
These delicate snowflakes add the perfect finishing touch to your winter wonderland cupcakes. For the full tutorial on making candy melt snowflake transfers, check out my Winter Cakesicle Tutorial where I walk through the process step-by-step.
Quick summary: Pipe snowflake shapes with white candy melts onto parchment paper using a template as a guide, sprinkle with sugar for a frosty effect while wet, let set for 15 minutes, then carefully transfer onto your cupcakes.
Step-by-step Winter Wonderland Decorating
Large rosette
Directions:
- Hover over the center of the cupcake at a 90 degree angle and apply medium pressure to pipe a star shape.
- Slightly pull the tip to the side and pipe a line around the star in a circular motion.
- Maintain consistent pressure while continuing to pipe a line in a circular motion around the initial one.
- Repeat this process until the entire surface of the cupcake is covered.
- To finish the rosette, gradually release pressure while following the swirl.
- Carefully tuck the end of the loop into the side and pull tip away.
- Place a candy melt snowflake a the end point of the rosette.


Mini Rosettes and Stars
Directions:
- With a Wilton 4B tip, pipe a mini rosette slightly off center.
- With a Wilton 2D tip, pipe a second mini rosette opposite of the first one.
- Fill in the empty spaces with drop stars with Wilton 32 tip.
- Add sprinkles to the end of one rosette and a mini candy melt snowflake to the end of the other.


Mini Rosettes with Ruffle Shells
Directions:
- Pipe a shell with a Wilton 2D tip, position the tip at the edge of the cupcake, ensuring it hovers slightly above the surface.
- Apply medium pressure to dispense a generous amount of buttercream, which will cause the tip to rise.
- While maintaining pressure, draw the tip downward toward the center of the cupcake.
- Pause, release the pressure and pull towards yourself to taper the end.
- Pipe a second shell beside the first one.
- Pipe a third shell beside the second one.
- Pipe a rosette slightly off center overlapping the tail of the shells with Wilton 4B tip.
- Pipe stars in the empty space left over with Wilton 32 tip.
- Add sprinkles the the center of your stars.
- Finish with a candy melt snowflake on the end of the rosette.


Mini Rosette with Star Border
Directions:
- Using a Wilton 32 tip, pipe a star at the perimeter of the cupcake.
- Pipe stars side by side along the entire edge of the cupcake.
- With a Wilton 4B tip, pipe a mini rosette in the center of the star border.
- Top with a candy melt snowflake.


Mini Rosettes with Zigzag
Directions
- With a Wilton 4B tip, pipe a mini rosette slightly off center.
- With Wilton 2D tip, pipe a mini rosette directly beside the first rosette.
- In the empty space left, pipe a zigzag using a Wilton 32 tip.
- To pipe a zigzag, position tip at a 40-45 degree angle.
- Starting from one end, use steady pressure to guide the tip along the surface of the cupcake in an up and down motion.
- Continue this motion until you reach the other end of the cupcake.
- Release pressure and pull tip away.
- Add sprinkles between the zigzag and the rosettes.
- Add a candy melt snowflake between the rosettes.


Tips for Success
Color palette matters: Stick to cool tones for the winter wonderland theme—pale blue, icy white, silver, and touches of light purple or gray. Avoid warm colors like red or orange, which break the wintery vibe.
Buttercream consistency is key: All these designs require medium-consistency buttercream that holds its shape but pipes smoothly. If your buttercream is too soft, rosettes will droop and stars won’t hold definition.
Plan your layout: Before you start piping, visualize where each element will go. For designs with multiple rosettes, start with the largest one first, then fill in around it.
Work quickly with transfers: Candy melt snowflakes are delicate and can melt from the heat of your hands. Use a palette knife to move them onto cupcakes rather than your fingers when possible.
American buttercream crusts: Remember that buttercream forms a crust after 5-10 minutes. Pipe all your designs first, then add snowflakes and sprinkles before the buttercream sets, or they won’t stick properly.
Practice makes perfect: If you’re new to piping rosettes or shells, practice on parchment paper first to get the motion down before committing to cupcakes.
Storage & Serving
Store decorated cupcakes in an airtight container at room temperature for up to 2 days, or refrigerate for up to 5 days. If refrigerating, let them come to room temperature for 20-30 minutes before serving for the best buttercream texture.
The candy melt snowflakes are delicate, so avoid stacking cupcakes directly on top of each other. If you need to transport them, use a cupcake carrier with individual slots.
These cupcakes look stunning displayed on a tiered stand with a light dusting of powdered sugar over the entire arrangement for that extra snowy effect!
Grab your piping bags and give these designs a try! I’d love to see your creations, so don’t forget to share them on social media and tag me @alchemy.sweets. 💙
And if you haven’t already, subscribe to my blog and Youtube channel for more cupcake decorating inspiration, tips and tutorials.
Happy decorating!