Buttercream flower piping is one of my favorite ways to bring garden blooms to life on cupcakes. In Part 3 of my challenge, I recreated hydrangeas, dahlias, daisies, and more straight from my garden!
What a crazy month it’s been! I officially rebranded as Alchemy Sweets and launched my cupcake orders. Between all the planning, sourcing supplies, and testing recipes, I’ve been busier than ever but I always make time for my flowers.
This round, I decided to have a bit more fun and move away from my original flower list. Instead, I drew inspiration straight from my garden, recreating both current blooms and some very anticipated favorites. While my vibrant dahlias are showing off their colors, my hydrangeas are just starting to emerge with fresh foliage but that didn’t stop me from imagining and crafting their blooms in buttercream!
Want to see these flowers come to life? Check out my video below showing the process from buttercream prep to finished blooms!
JUMP TO
Difficulty Scale Legend
★★★★★ (5/5) = Very challenging, advanced piping skills required
★★★★☆ (4/5) = Moderately difficult, some experience needed
★★★☆☆ (3/5) = Intermediate skill level, requires patience and control
★★☆☆☆ (2/5) = Beginner-friendly, some practice helpful
★☆☆☆☆ (1/5) = Very easy, great for absolute beginners
The Next 8 Buttercream Flowers
Garden-Inspired Buttercream Flower Piping Challenge: Part 3
Hydrangea (Classic Cluster)
★★☆☆☆ (2/5 difficulty) | Wilton #2D + Two-Toned Piping Bag


I’ve always loved how hydrangeas create magnificent clusters of tiny blooms. For this version, I used a two-toned piping bag with my Wilton 2D tip, creating a beautiful gradient starting with a light center and darkening toward the edges.
My take: This is very beginner-friendly! The 2D tip creates that clustered effect in one motion, consistent pressure gives you the full hydrangea look instantly. The two-toned bag makes this flower special, adding dimension without extra work. Without the two-toning, I’d rate this closer to 1/5 difficulty.
Check out my blog posts: two-tone piping bag and learn to pipe buttercream flowers for step by step on how I create these hydrangeas.
Hydrangea (Petal by Petal Approach)
★★★☆☆ (3/5 difficulty) | Wilton #103

For this hydrangea, I started with the Wilton #2D base then piped individual flowers with the #103 tip, finishing with pearl sprinkles for flower centers. Instead of a neat two-tone, I semi-blended two colors in the bag for a more natural variation.
Why 3/5? While each individual flower is simple to pipe, the challenge comes from having to pipe many of them consistently and letting them set completely before handling. Attaching them to the cupcake takes patience and gentle handling – it’s a commitment! And if you’re not used to piping, doing that many small flowers can make your hand pretty tired. But if you’re just starting out, it’s actually a great one to learn with – it helps you get a feel for pressure control, shaping petals, and even practicing how to turn the flower nail with your other hand. All the little things that build a strong foundation!
Dahlia (Cactus Variety)
★★★☆☆ (3/5 difficulty) | Wilton #352

Inspired by the vibrant pink cactus dahlias growing in my garden (just like the ones in the photo!), I recreated those dramatic, spiky petals with a Wilton #352 tip. The pointed, almost star-like appearance of these dahlias makes them so striking, if only I had a brighter pink food coloring to really make them pop!
My take: The #352 tip is perfect for capturing those distinctive spiky petals of cactus dahlias. This technique is actually quite similar to the sunflower I piped in Part 2 of the challenge, just with different petal shapes and colors. Creating a tight center and then gradually allowing the petals to extend farther gives that authentic cactus dahlia look.

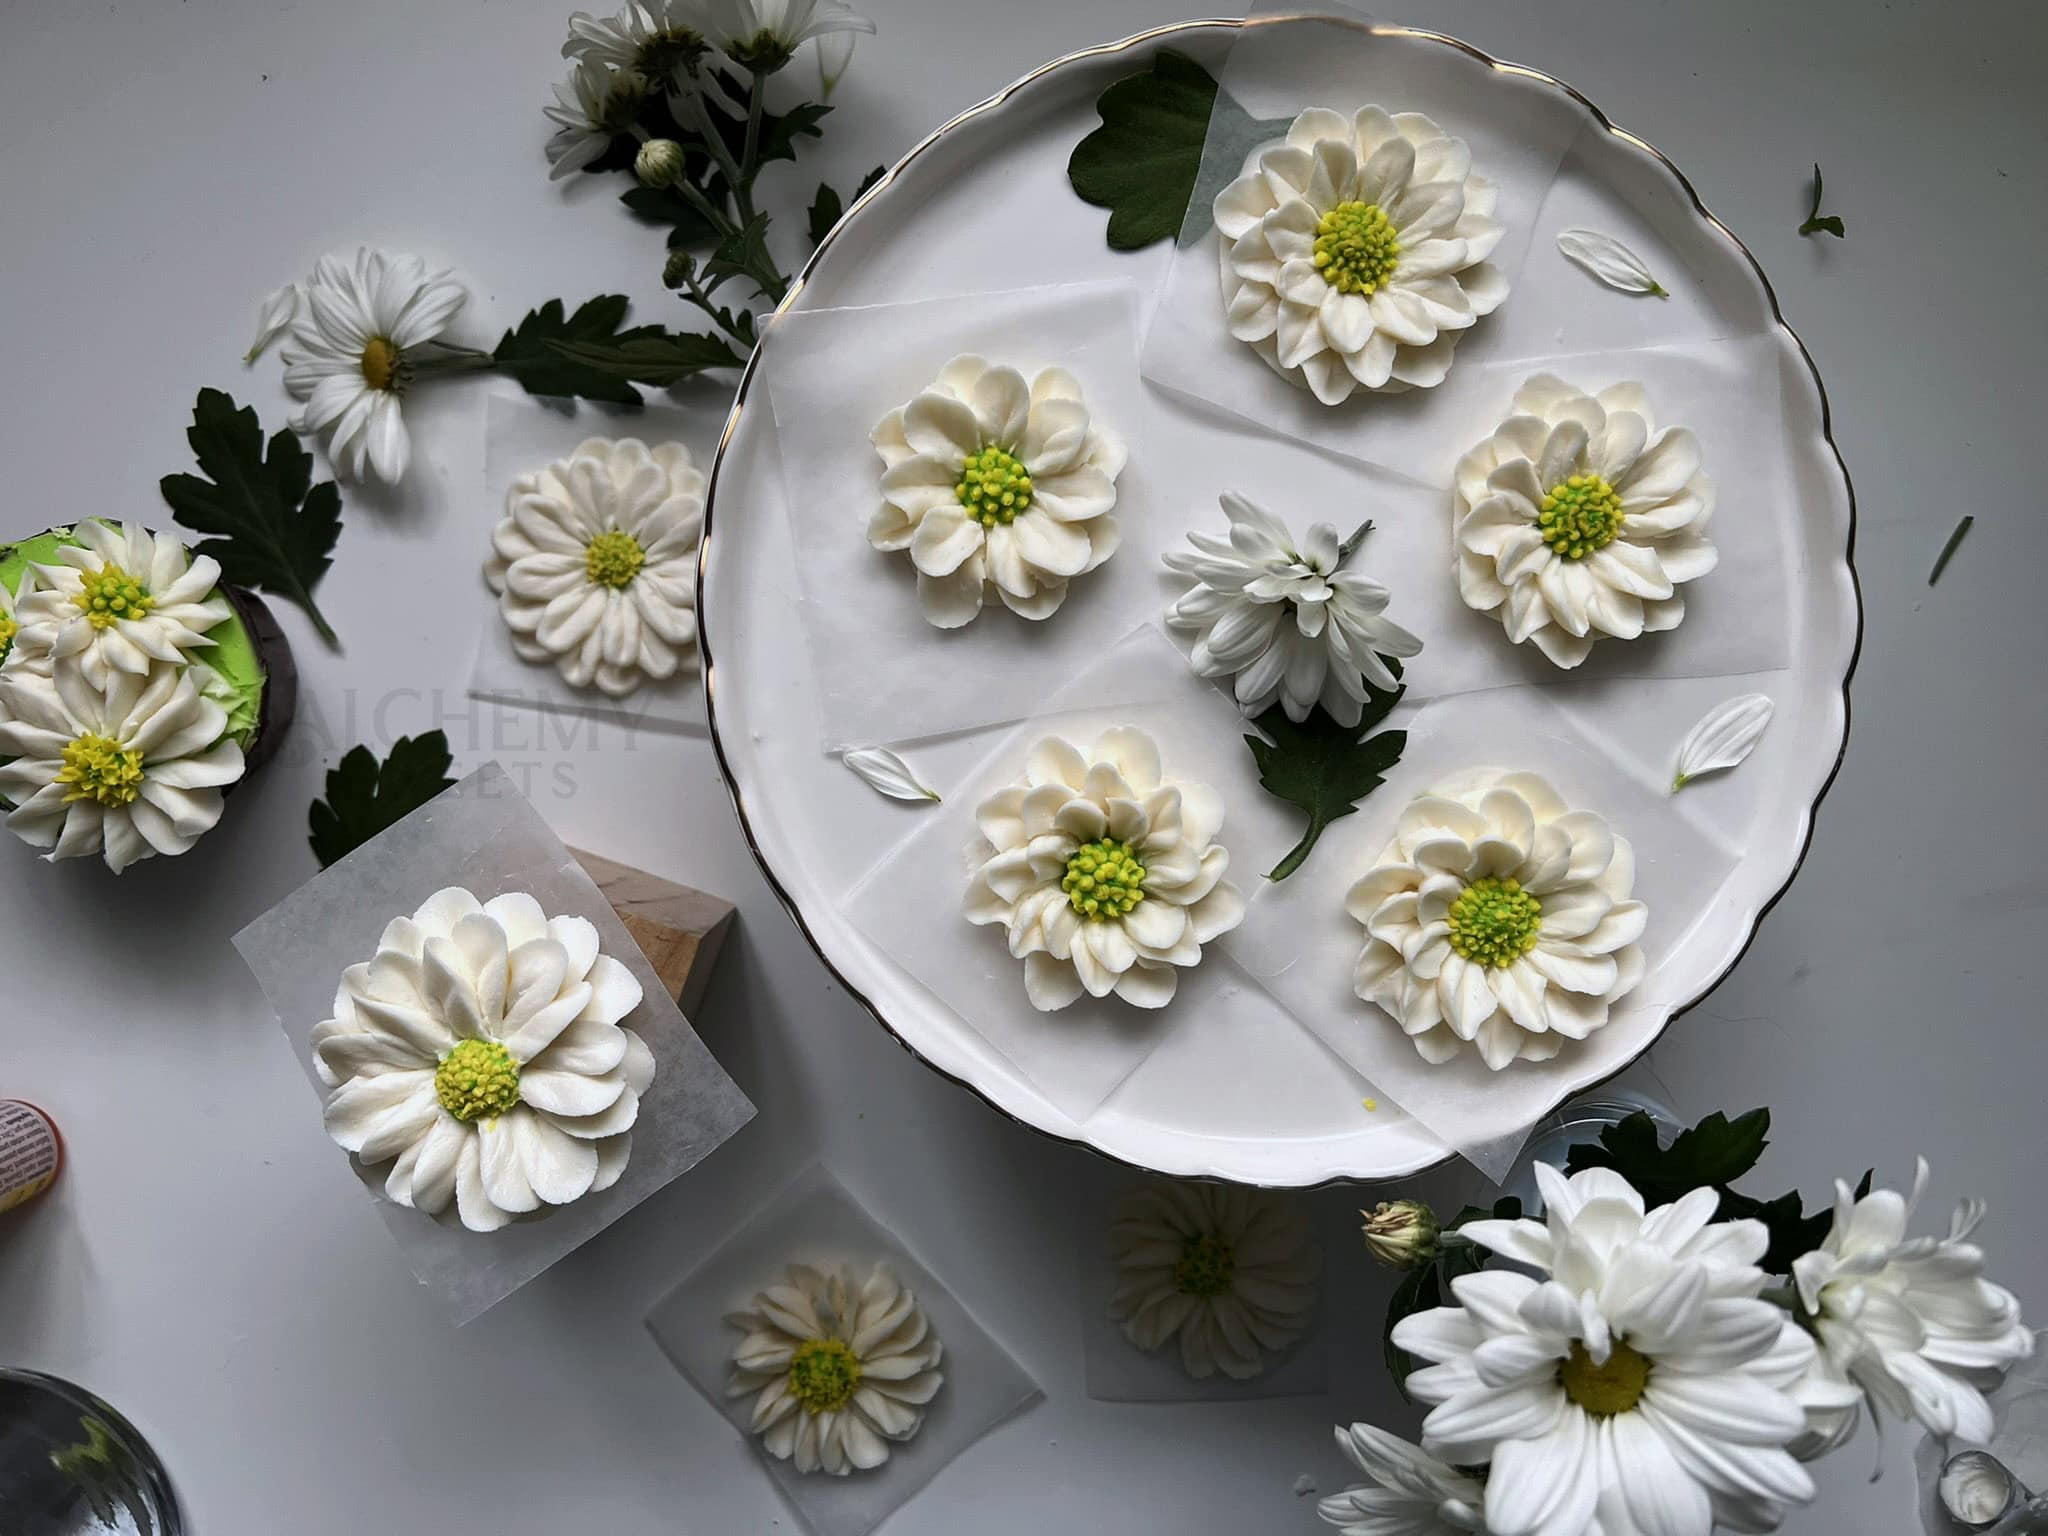
Osteospermum Daisies
★★★☆☆ (3/5 difficulty) | Wilton #104, #13 and, #2 or 3


My garden osteospermum (African daisies) inspired me to recreate both color varieties in buttercream.
My take: These didn’t turn out exactly how I imagined, but they’re still pretty flowers! I should have focused more on two-toning the piping bag (sort of like I did with the geranium) to get that distinctive light-center-to-dark-edge gradient that osteospermums have – that’s really what sets them apart from other daisies. I also experimented with petal shapes and amounts, as these can have varying numbers of petals. Overall I’m happy with how these blooms turned out.


Marigold
★★☆☆☆ (2/5 difficulty) | Wilton #102

These vibrant orange marigolds are such cheerful additions to my garden beds. I love how their ruffled, papery petals catch the light and create such texture. For my buttercream version, I went with that classic bright orange color that makes marigolds so instantly recognizable.
My take: These turned out really well! The ruffled look is forgiving since they’re naturally irregular – imperfect shapes actually make them look more realistic. I built up layers from bottom to top, varying pressure to get different petal sizes. The natural texture means you don’t have to be perfect. Definitely a new favorite to pipe!
Alyssum
★★☆☆☆ (2/5 difficulty) | Wilton #102

Kind of boring and basic looking, but they are so cute and precious still. These tiny white flowers are so modest in the garden but create such a beautiful carpet effect. Recreating their clustered appearance was a fun challenge. Also they are quite fragrant!
My take: The #102 tip worked well, but I think a smaller tip like #101 would create more delicate petals next time. Working quickly without overthinking each flower gave the most natural look. These are pretty basic but would make good filler flowers – maybe a small star tip would match their size better…ha.
Geranium
★★★☆☆ (3/5 difficulty) | Wilton #104

The bright pink geraniums in my garden pot have such distinctive individual blooms. I wanted to capture that vibrant color and the perfect five-petal shape that makes each geranium flower so recognizable. I had to stop myself from running out and getting the brightest, most fluorescent pink I could find just for these…ha!
My take: I used a two-toned bag with lighter pink in the creases and darker pink in the middle – this created that gradient with light centers and edges, darker middles (almost looks like they’re glowing!). I piped them as individual flowers rather than in their natural clusters, but I’m thinking about trying the cluster approach next time!

Zinnia
★★☆☆☆ (2/5 difficulty) | Wilton #102

I was creating another flower but it came out looking more like a zinnia, so I went with it! I don’t have zinnias in my garden this year, but I did last year – gorgeous pinks and oranges, some with speckles. I’ve never actually seen a pure white zinnia before though. Have you ever grown white zinnias?
My take: These were made very similarly to the marigolds but are actually easier since you don’t need the ruffling effect – just round petals layered from the bottom up. Sometimes when a flower doesn’t turn out as planned, it can become something even better! This reminded me to stay flexible and embrace those happy accidents that happen at the piping table.
Notes from the Piping Table
After completing flowers #19-26 (I think…), I’ve gathered some more valuable insights:
Garden inspiration is everywhere: Looking to my actual garden for ideas made this round of flowers feel much more personal and meaningful. (the colors are so hard to capture!)
Flexibility over perfection: This round taught me that flowers are naturally forgiving, and letting go of rigid expectations often leads to surprisingly beautiful results – like my happy accident zinnia!
There’s no single “right” way: Experimenting with different approaches to the same flower (like my hydrangea variations) reminds us that technique isn’t linear. What works for one person might not work for another – find your own way!
What’s Coming Next
With this garden-inspired collection complete, I’m already planning Part 4! I’ll be featuring wildflowers I’ve discovered on nature walks.

Join Me on This flower Journey!
If you’re following along or joining the challenge yourself, don’t forget to tag me @alchemy.sweets on IG, I would love to see your beautiful buttercream blooms too!
If you missed the previous parts of this challenge, you can catch up with Part 1 and Part 2 to see how this journey began and progressed.
For more flower piping content, subscribe to my YouTube channel for more decorating and buttercream flower videos.
Stay tuned for Part 4 – the adventure continues!
Happy decorating!