*post was written under previous alias; Blossom & Cake
If you’ve ever wanted to learn to pipe buttercream flowers, this beginner-friendly tutorial will guide you step-by-step to create hydrangeas, rosettes, and roses on cupcakes and cakes.
How else can you elevate your buttercream flowers? We’ll be using two-toned piping techniques for the hydrangea and rosette to add depth and dimension to your flowers. Plus, I’ve included a real-time decorating video on Youtube, so you can decorate right along with me. The video also features a short clip of me two-toning a piping bag.
These designs are perfect for taking your cupcakes (and cakes!) up a notch—whether it’s for a special occasion or just for fun (which is my favorite reason 😉). With a few tools and a little practice, you’ll be piping pretty flowers like a pro in no time.
Let’s get started!
JUMP TO:
What You’ll Need
- Piping tips; Wilton 2D, Wilton 104 and Wilton 352
- Piping bags
- Cupcakes; flavor of your choice
- Gel food coloring (I used a muted purple and white),
- Green buttercream for leaves
- Sprinkles
- Parchment; optional for practice,
- Flower nail; optional for practice.
Buttercream; recipe here

Some notes before getting started:
To get the best results, start with room temperature cupcakes. However, whether you’re using room temperature or frozen cupcakes, both can work! Just keep in mind that frozen cupcakes need to thaw slightly before icing—otherwise, the cold surface can make the buttercream harden too quickly, making it tricky to spread or pipe smoothly.
For room temperature cupcakes, icing the tops first gives the buttercream flowers something to stick to and ensures the cupcake is fully covered. The cupcakes I used in this tutorial were frozen, and you’ll see how the hydrangeas and rosettes below turned out beautifully. As frozen cupcakes thaw, the tops become slightly sticky and can actually help the buttercream adhere to the surface.
Setting Up a Two-Tone Piping Bag
For the hydrangeas and rosettes, the same two-toned buttercream and piping tip are used to make this tutorial beginner-friendly. To prep, fit a piping bag with a 2D tip and fill it with two shades of buttercream—here I used purple and white.
- Prepare the piping bag:
- Fit the piping bag with your chosen piping tip (e.g., Wilton 2D or 104).
- Add the outer color:
- Take a butter knife and spread the first buttercream color (outer color) along the inside of the piping bag.
- Start as close to the piping tip as possible and work your way up, covering about halfway up the bag.
- Add the inner color:
- Use a spoon to scoop the second buttercream color (inner color).
- Carefully place the inner color into the piping bag, aiming to keep it in the center and as low as possible.
- Use your thumb to scrape the buttercream off the spoon while inserting it into the bag.
- Close and position buttercream:
- Once both colors are in the bag, twist the top of the piping bag closed.
- Squeeze the buttercream down toward the tip until both colors appear evenly.
Step-by-Step Buttercream Flowers
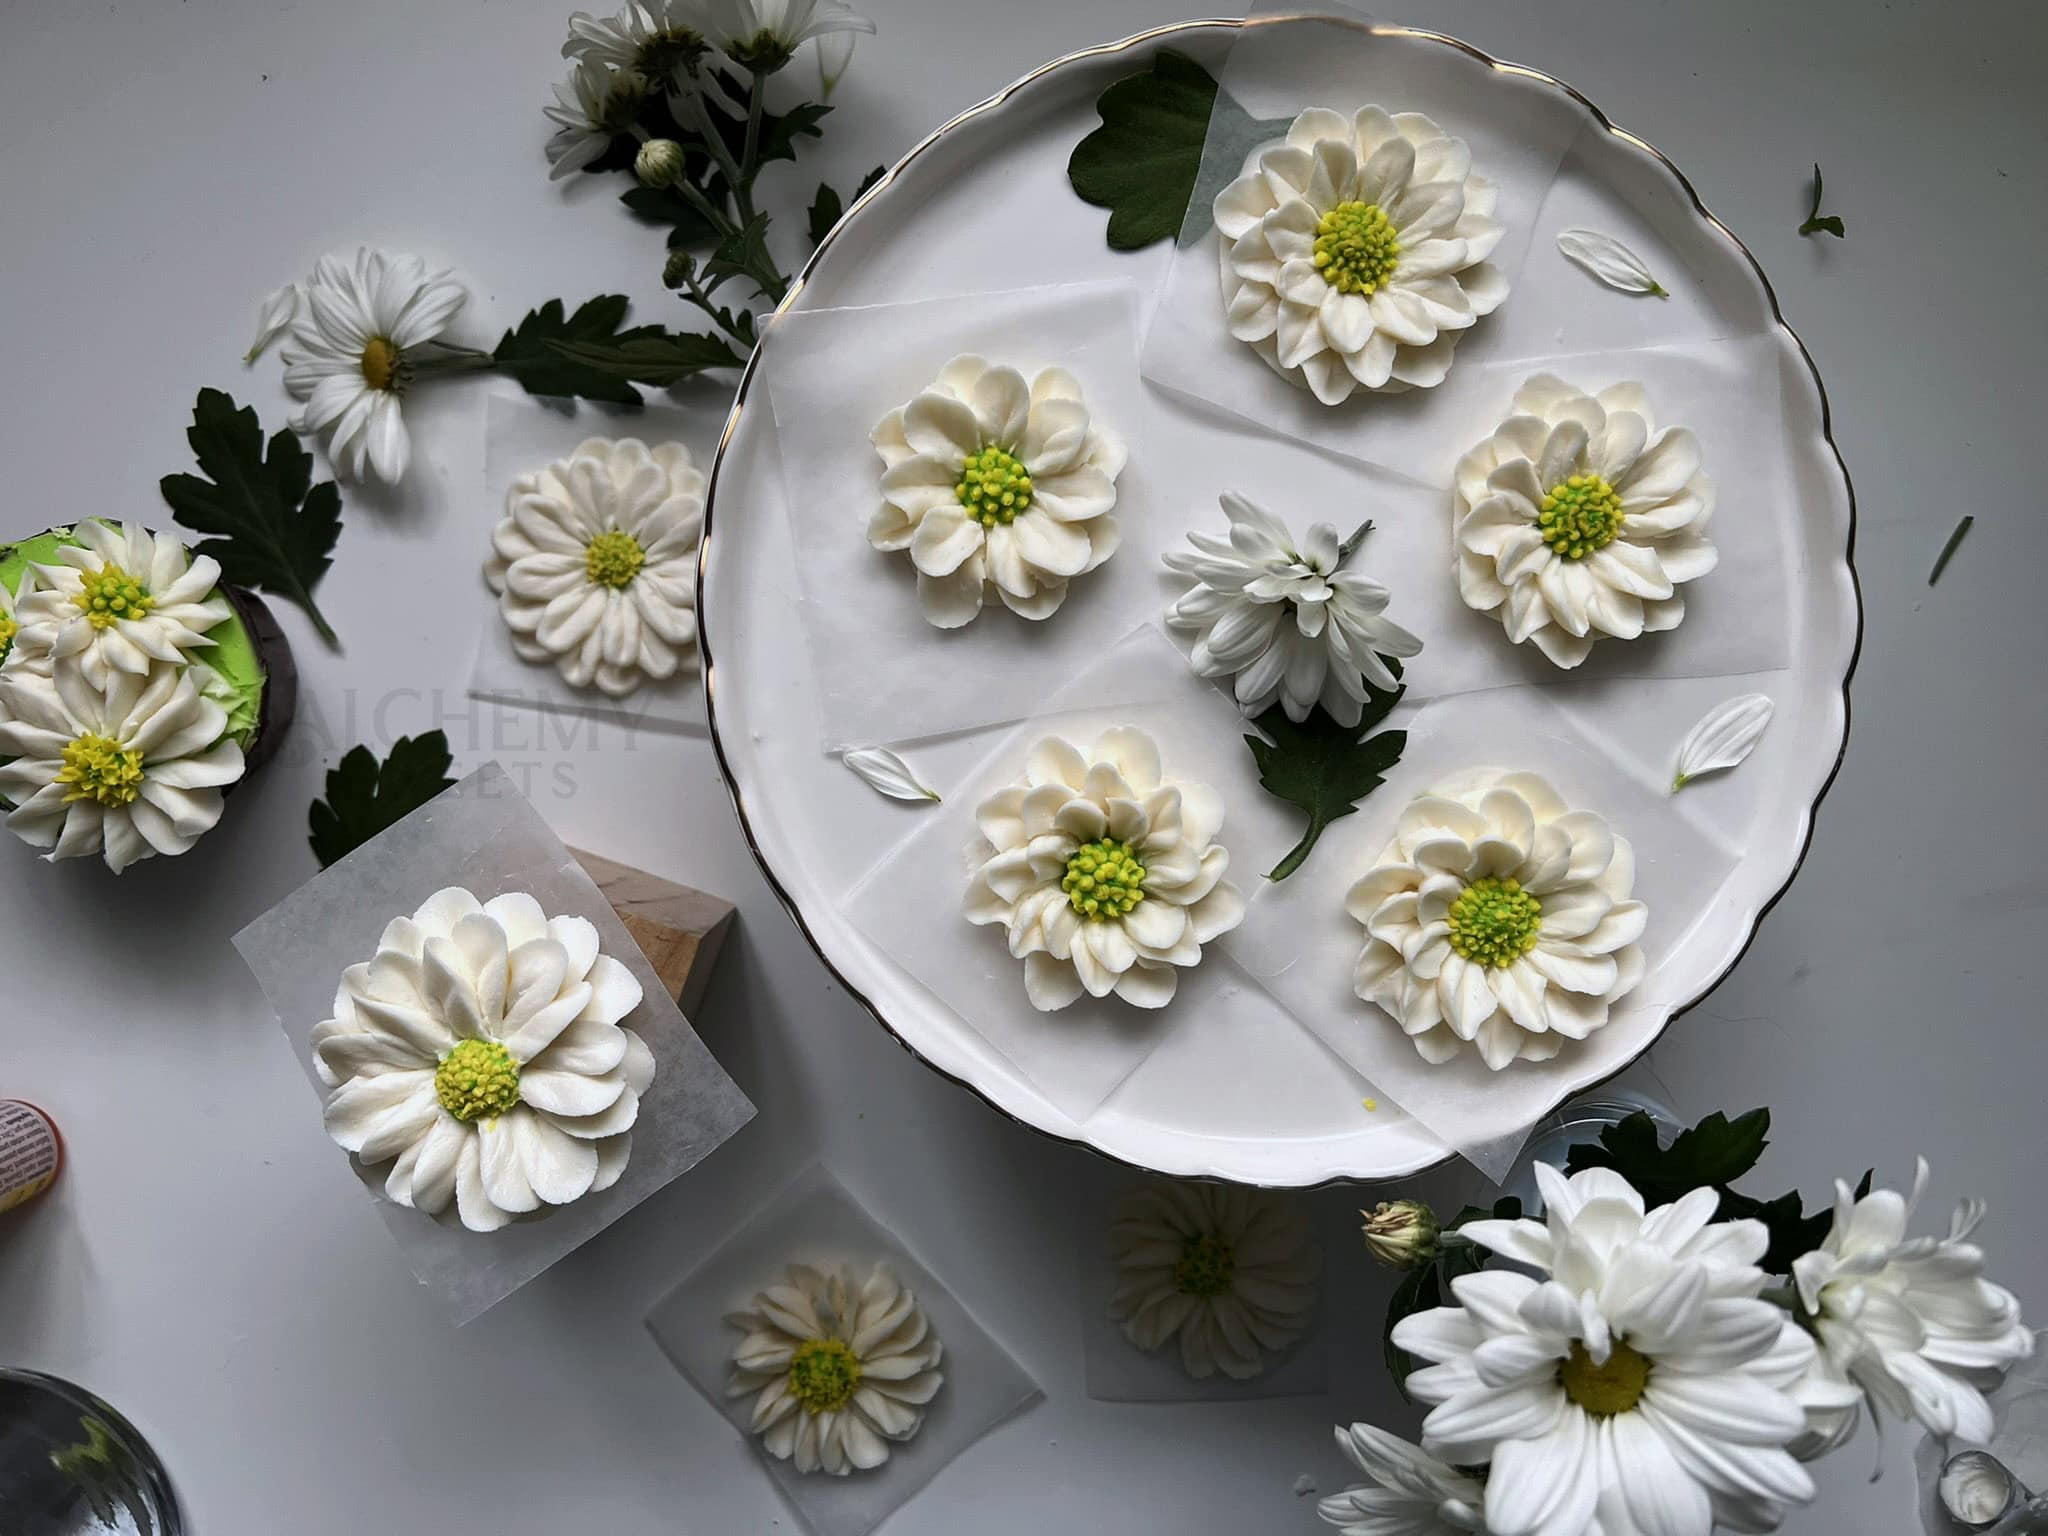
Two Toned Hydrangeas
- Prepare piping bag: Fill a piping bag fitted with a Wilton 2D tip. For a two-toned effect, add two complementary buttercream colors.
- Start piping: Slightly hover the tip above the cupcake’s surface.
- Pipe the first petal cluster: Apply steady pressure, letting the buttercream flow out.
- Swivel cupcake: Gently rotate the cupcake to help shape the petal cluster.
- Release and lift: Stop applying pressure and lift the piping tip away.
- Continue around the edge: Pipe more petal clusters around the perimeter of the cupcake, overlapping slightly for a full look.
- Fill the center: Pipe petal clusters in the middle until the cupcake is fully covered.
Tips:
- Use gentle, even pressure for consistent petals.
- Practice on parchment paper first if you’re new to piping.
- For a realistic look, vary the direction of each petal cluster slightly.

Two Toned Rosette w/ gold sprinkles
- Prepare piping bag: Fill a piping bag fitted with a Wilton 2D tip. You can use one or two colors for added flair.
- Start at the center: Hold the piping tip directly above the center of the cupcake and pipe a small star.
- Begin the swirl: Without releasing pressure or lifting the tip, pull slightly to the side and pipe a tight circle around the star.
- Expand the swirl: Continue piping another tight circle around the first one until the cupcake is fully covered.
- Finish the rosette: Gradually release pressure as you near the end of the swirl and pull away in the same direction as the circle.
- Add sprinkles: Decorate the end of the rosette with sprinkles.
Tips:
- Hold the piping bag at a 90° angle to the cupcake for an even swirl.
- Use steady pressure for smooth, uniform piping.
- Chill the cupcake briefly if the buttercream is too soft to hold its shape.

Classic Rose
- Prepare piping bag: Fit a piping bag with a Wilton 104 tip, narrow end up, and fill with buttercream.
- Create the base: Pipe a small mound of buttercream in the center of the cupcake as the rose’s foundation.
- Pipe the center bud: Hold the narrow end of the tip facing up. Rotate the cupcake while piping a tight vertical swirl around the mound to create the rosebud.
- Add the first layer of petals:
- Hold the tip at a slight angle, with the narrow end up and the wide end touching the base of the bud.
- Pipe 3 overlapping petals around the rosebud, gently turning the cupcake as you go.
- Add additional petal layers:
- Continue piping petals in overlapping layers.
- Make each new layer slightly wider and more angled outward for a realistic bloom.
- Finish the rose: Pipe enough petals to cover the cupcake, gradually increasing the size until the entire top is filled.
Tips:
- Rotate the cupcake or use a turntable for smooth, even petals.
- Practice piping on parchment first to perfect petal shapes.
- Chill the cupcake briefly if buttercream becomes too soft.
- Tilting the cupcake slightly away from you makes it easier to shape the petals.

Small rose and Rosettes w/ leaves
- Prepare piping bags:
- Fit one piping bag with a Wilton 104 tip and white buttercream for the rose.
- Fit a second piping bag with a Wilton 2D tip and two-toned buttercream for the rosettes.
- Fit a third piping bag with a Wilton 352 tip and green buttercream for leaves.
- Pipe the small rose (Wilton 104):
- On one half of the cupcake, hold the 104 tip with the narrow end up.
- Pipe a small rose by creating a tight bud in the center, followed by 2–3 layers of overlapping petals. Keep the rose small to leave room for the rosettes.
- Pipe two small rosettes (Wilton 2D):
- Divide the other half of the cupcake in two, pipe two small rosettes.
- Start at the center of each quarter, pipe a tight spiral, and release pressure as you finish the swirl.
- Fill gaps with leaves (Wilton 352):
- Use the green buttercream to pipe small leaves between the rose and rosettes, as well as around the edges to fill any empty spots.
- Hold the tip at a 45° angle, with tip looking like a beak, press to pipe the base of the leaf, then pull away while releasing pressure to create a pointed tip. Pipe 2-3 leaves for each space.
- Add sprinkles:
- Decorate the ends of the rosettes with small sprinkles for a fancy finishing touch, and to tie them into the larger rosettes.
Tips:
- Use a turntable to help with even placement of the rose, rosettes, and leaves.
- Keep the design balanced by spacing the elements evenly across the cupcake.
- Chill the cupcake briefly if buttercream softens while working.

Tips for Success
Temperature is everything. Use room temperature buttercream for easier piping. If it’s too stiff, the flowers will look jagged and your hand will tire out quickly. If it’s too soft, petals won’t hold their “crisp” shape. A quick fix: beat stiff buttercream briefly to loosen it, or chill your piping bag in the fridge for a couple of minutes to firm things back up. Another handy hack that I use sometimes: keep an ice pack nearby to rest your piping hand on between cupcakes – your hand transfers a lot of heat.
Practice on parchment first. Before decorating on cupcakes, pipe onto parchment paper with one color to get the feel of the pressure and movement. The best part? You can scrape it back into your bowl and use it again. Nothing wasted. You may also be interesting in using practice buttercream.
Rest your forearms on the table. This one tip alone will improve your control dramatically. Hovering your arms in the air while piping makes everything shakier. Ground yourself, steady your grip, and let your wrist do the work.
Consistent pressure is the real skill. Most beginner piping issues come down to uneven pressure. Too much and petals spread; too little and they look pinched. Squeeze tests on parchment until you find a smooth, steady flow before moving to the cupcake.
Clean your tips between cupcakes. A quick wipe with a damp cloth keeps your colors clean and your tips free of crusty buildup that can distort petal shapes.
Don’t feel locked into my colors. The purple and white here are just one option. Soft peach and cream, dusty rose and sage, deep burgundy and blush – your color combo is where your personality comes through. Experiment freely.
Imperfection is part of the charm. Buttercream flowers don’t need to look identical. Slight variation in petal direction, size, and fullness is exactly what makes them look handmade and beautiful rather than stamped out.
Conclusion
Now that you’ve learned how to learn to pipe buttercream flowers, you can try creating your own cupcake bouquet or custom designs!
If you enjoyed this tutorial, be sure to check out the real-time decorating video for visual reference. Don’t forget to subscribe to my blog and Youtube channel for more fun and beginner-friendly tutorials like this.
Ready to take these flowers to the next level? Check out my latest post, How to Arrange Buttercream Flowers into a Cupcake Bouquet, for a step-by-step guide to creating a stunning cupcake bouquet! You can also check out my other buttercream flower tutorials here.
Happy decorating!