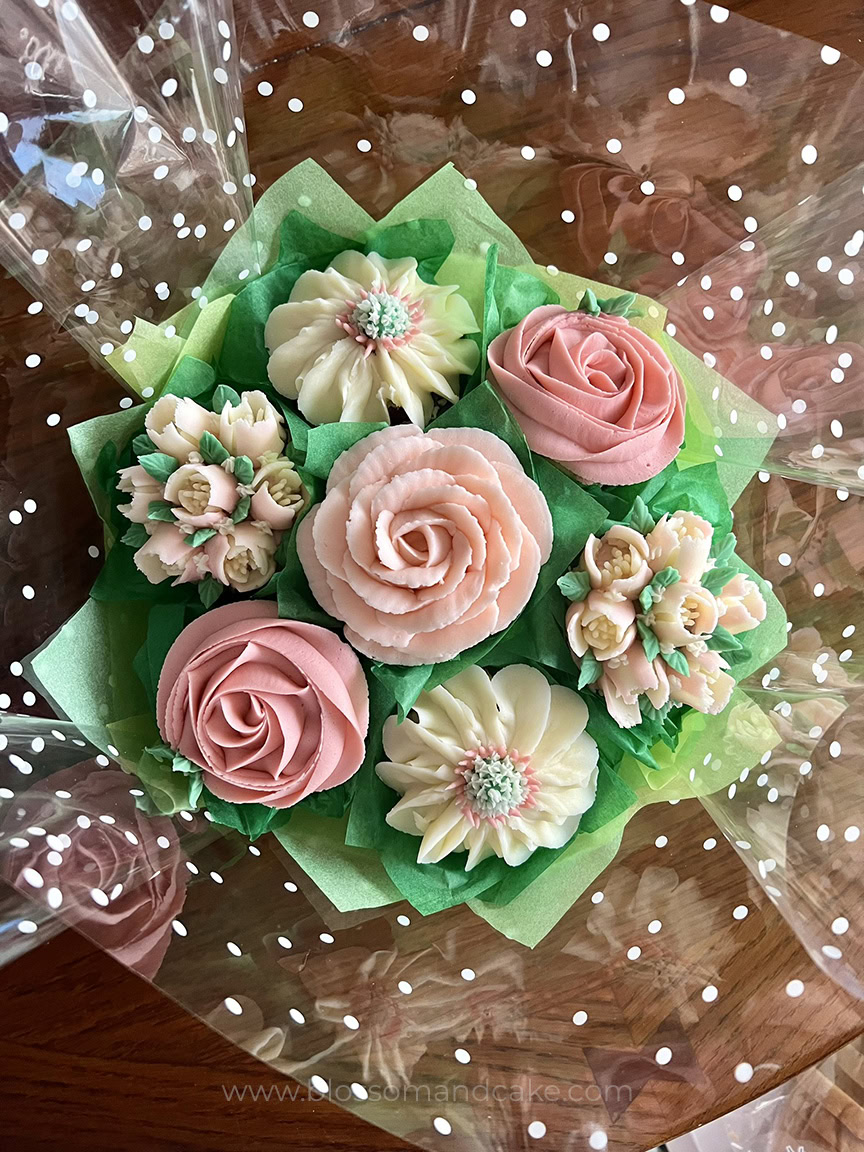
Sometimes a batch of cupcakes doesn’t need a theme or an occasion, just a color palette that feels like spring finally arrived. This is one of those batches. Roses, ranunculus, scabiosa, and hydrangeas in pink, yellow, blue, and green, all piped in buttercream and arranged in a box that honestly looks better than any floral arrangement I’ve put together.
This isn’t a step-by-step tutorial, it’s more of a design breakdown and starting point. If something in the photos catches your eye, I’ve linked the full tutorials below so you can dive deeper into each flower.
If you’ve ever wanted to try buttercream flowers but didn’t know where to start, this kind of mixed-flower design is actually one of the easiest ways in. You don’t need to master one perfect flower, you can combine a few simpler ones with a couple of more detailed blooms, and the overall effect still looks full and intentional.
That’s exactly what’s happening here. A mix of easier flowers to begin with and a few more advanced ones, all tied together with a soft spring color palette.
Jump To
How to Approach a Mixed Flower Cupcake Design
Before getting into the specific flowers, here’s the general approach that makes a mixed design like this work:
- Start with 2–3 flower types rather than trying to do everything at once
- Mix sizes, at least one large focal flower, one medium, one filler
- Use filler flowers to cover gaps without needing extra precision
- Stick to a cohesive palette so the variety of shapes doesn’t feel chaotic
You don’t need to plan it out perfectly on paper. Once you have your flowers piped and your colors mixed, the arrangement tends to come together naturally.
The Flowers
The design uses four flowers, ranging from beginner-friendly to genuinely tricky:
- Roses and rosettes: the pink ones in this batch, and a good place to start if you’re new to buttercream flowers. They’re forgiving, they pipe quickly, and they anchor a design well. Try varying the size slightly across cupcakes to keep the arrangement from feeling too uniform. Tutorial here.
- Hydrangeas: the green clusters. Easier than they look, and especially helpful if your cupcakes feel empty, they fill space quickly without needing a lot of precision. Tutorial here.
- Ranunculus: the yellow ones. Similar technique to a rose but with looser, more open petals. Start at the center, work outward, and hold your 104 tip at about 45° with the wide end at the base. Keep the petals slightly separated rather than tight — that open, airy quality is what makes them stand out from a standard rose. If your petals start looking too tight, ease up on your pressure slightly and adjust your angle.
- Scabiosa: the blue flowers with the green centers, and the most advanced in this batch. These take more practice than the others, but they improve quickly with repetition, don’t write them off after the first attempt. You can see the technique in Part 2 of my 100+ Buttercream Flower Challenge.

Why This Arrangement Works
What makes this combination feel balanced is the mix of shapes and sizes.
- Roses and ranunculus act as focal flowers, they’re large, detailed, and draw the eye first
- Hydrangeas fill in gaps and soften the overall arrangement
- Scabiosa adds contrast with a more open, textured center
When you’re building a cupcake design like this, think less about perfection and more about contrast. A mix of tight petals, open blooms, and filler flowers will always look more natural than repeating the same flower across every cupcake.
This is also why mixed boxes are a good starting point for beginners, small inconsistencies in individual flowers disappear into the overall design. Nobody’s looking at one cupcake in isolation.
The Color Palette
All mixed from gel food coloring into white buttercream. Gel is concentrated, start with less than you think you need, and keep in mind that colors deepen as the buttercream sits.
- Yellow – Lemon yellow with the smallest touch of orange to warm it up.
- Pink – Rose pink or pastel pink gel in white buttercream. Adjust the ratio depending on how bold or soft you want it.
- Blue – Mix a pink-purple first using some of your pink, then slowly add blue until it deepens into that slightly dusty, dimensional cornflower tone.
- Green – A mix of vert green and olive, a touch of yellow, toned down with white. Keeps it from reading as too bright or artificial.
When working with a palette like this, consistency matters more than exact shades. Even if your colors aren’t identical to these, keeping them all slightly muted or slightly soft will help everything feel cohesive. If a color feels too bright, adding a small amount of its complementary color or simply more white buttercream, can bring it back down.
If you want to go deeper on buttercream color mixing in general, I have a free guide covering 9 of my most-used colors for florals here.

A Few Things That Help
If you’re new to piping multiple flowers in one batch, a few small adjustments make a real difference:
- Work in batches of 2–3 cupcakes at a time so your buttercream stays at the right consistency throughout
- Rotate the cupcake as you pipe rather than moving your hand, it gives you smoother, more even petals
- Practice each flower on parchment first, especially ranunculus and scabiosa
- Pipe your simpler flowers first, hydrangeas and rosettes, to warm up before moving to the more detailed ones
- Chill your buttercream if it starts to feel too soft, definition matters most on multi-petal flowers
- Don’t overthink placement, a little randomness in the arrangement looks more natural than anything perfectly symmetrical
- A touch of edible glitter at the end does more than you’d expect
More Spring Flowers to Try
If you want to expand on this palette, tulips and daisies are both natural fits for a spring arrangement and would layer in really well with what’s here.
- Buttercream tulips: bold, graphic, and surprisingly satisfying to pipe. Tutorial here.
- Buttercream daisies: simple enough for beginners, pretty enough to anchor a whole design. Tutorial here.
Want to Turn These Into a Bouquet?
These flowers work just as well arranged as a cupcake bouquet as they do in a box. Full assembly guide here.
Spring flowers also translate really naturally to Easter, if you’re planning a holiday table and want something a bit more specific, take a look at Easter cupcakes post.
The Short Version
This kind of design is one you can come back to again and again, just by changing the colors or swapping out a flower or two. Once you’re comfortable with a few base techniques, you can create something that looks completely different every time.
And that’s kind of the magic of buttercream flowers, a few approachable skills can go a really long way.
Made something inspired by this? I’d love to see it, tag me @alchemy.sweets on IG.
Happy decorating!