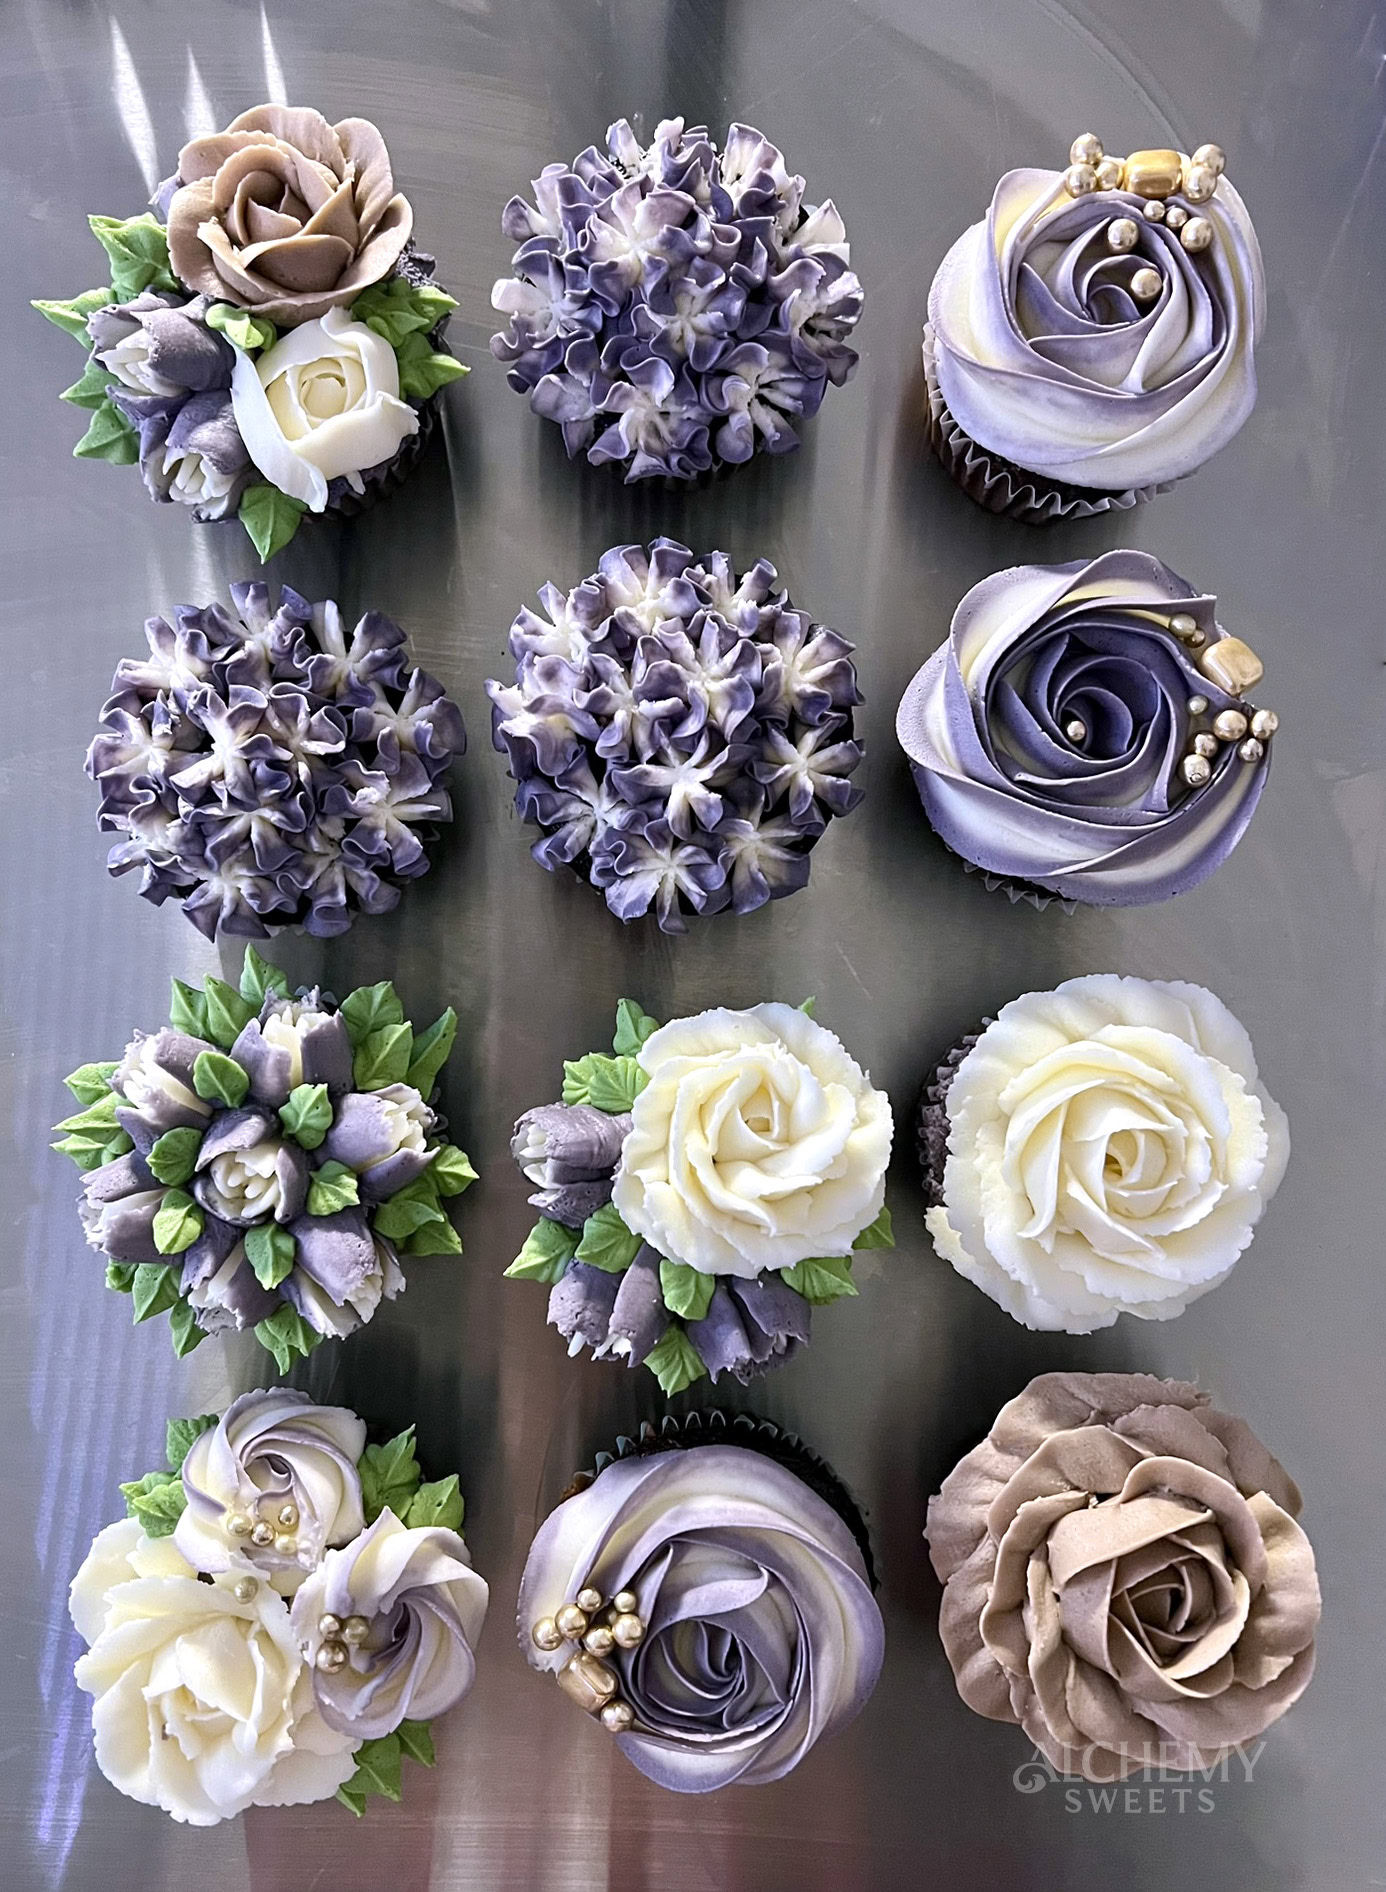
Buttercream shamrocks are one of those small additions that can really elevate your decorations without adding a lot of complexity. They come together quickly, freeze beautifully, and work on everything from St. Patrick’s Day cupcakes to spring-themed celebration cakes. I love keeping a batch in the freezer as a last-minute decorating option, and the optional gold luster dust takes them from simple to genuinely stunning with almost no extra effort.

What You’ll Need
- Flower nail
- Piping tip: 104 petal tip
- Parchment squares
- Green buttercream
- Palette knife (for transferring to cake surface)
- Optional: Gold luster dust + a small brush OR Gold luster pen
How to Pipe Buttercream Shamrocks
For the color, I mixed basic green and bright green gel colors in a 2:1 ratio using my buttercream for piping flowers.

Set Up Your Flower Nail
Cut small squares of parchment paper and secure one onto your flower nail with a tiny dot of buttercream. This way, you can slide the finished shamrock off easily and set it to the side without touching it.
Pipe the Shamrock Stem and Leaflets
- With the narrow end of the piping tip facing up, pipe a short stem where you want the base to be. This becomes the anchor point where your leaflets will meet. Essentially “stamp” the piping tip to make the stem.
- Place the wide end of the tip at the center point and pipe toward the edge of the flower nail.
- Tip: As you pipe, turn your flower nail in the opposite direction. Pipe to the right, turn to the left. This countermovement helps shape each leaflet.
- Make a small arch, then slowly come back down and up again to create a second arch. This gives you that classic ‘M’ motion that forms each heart-shaped leaflet.
- Pull back down to the center to complete the leaflet.
- Release pressure before pulling away.
- Repeat this 2–3 more times, overlapping the leaflets slightly as you work around the center point. This also helps the overall shape stay together, for transferring purposes.


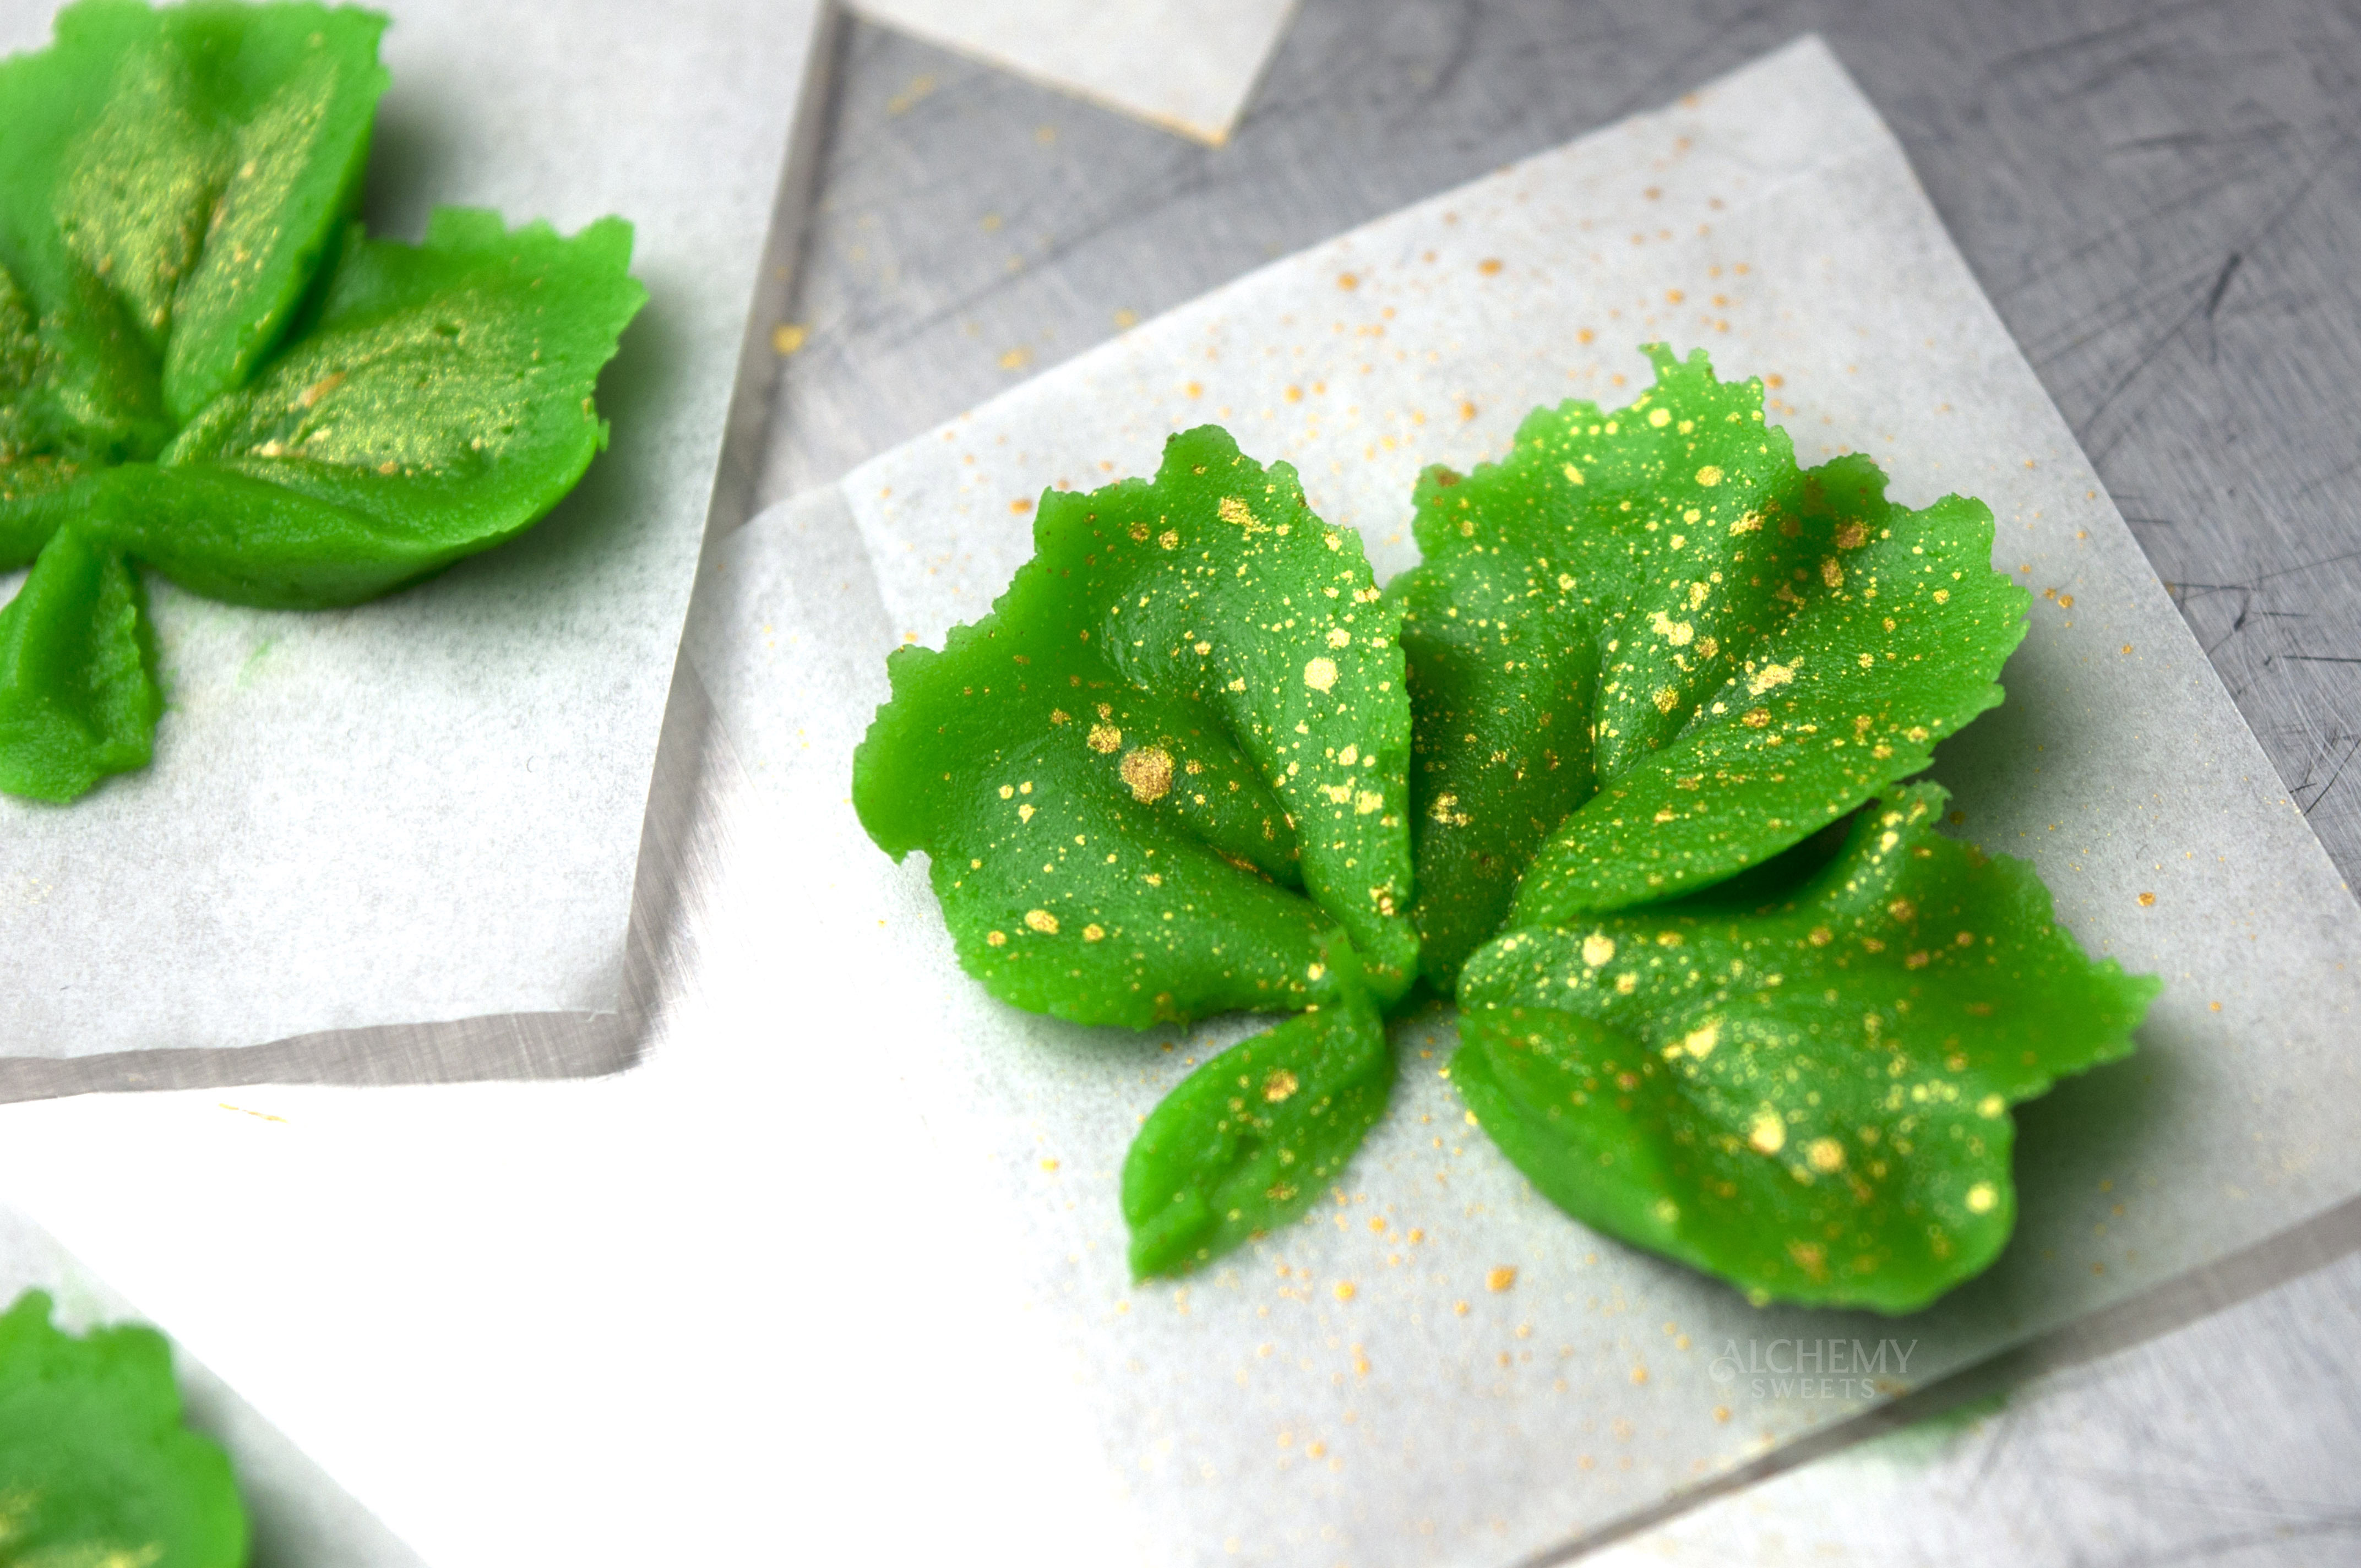
And what’s a shamrock without a little gold? ✨
Start with dry luster dust, a luster and alcohol/vanilla extract paint, or a gold luster pen.
You can flick, tap, or brush a paintbrush loaded with gold luster onto the shamrocks, each technique creates a different effect. Flicking gives fine, delicate specks for a shimmer effect, while tapping creates bigger, bolder specks. For brushing, make sure the shamrock is completely set or frozen first, and with a gentle touch paint the edges, the center, or wherever you want the gold to be.


How to Transfer
Let your shamrocks sit at room temperature until they form a crust, then use a palette knife to gently lift them off the parchment and attach to your cupcake or cake with a small dot of buttercream. For easier handling, let them crust first then pop them in the freezer — once frozen they’re much less delicate and you can pick them up with your fingers. The stems may break off, and that’s totally fine! Just pipe a fresh stem where you want to place the shamrock, or arrange the pieces separately.
Tips for Success
- A 103 tip gives slightly smaller, more delicate leaflets; a 104 tip gives a bit more fullness, both work fine.
- Keep your buttercream on the stiffer side so the leaflets hold their shape. My Buttercream Recipe for Piping Flowers works well for these.
- If your leaflets are drooping or spreading too much, your buttercream may be too soft, pop it in the fridge for 10–15 minutes and try again.
- Make extras! They freeze well and having a few backups is always a good idea. You can pipe a lot with a generous spoonful of buttercream.
- If the edges of your leaflets are frayed, it may be the tip. I run into this with a couple of my petal tips that have a tiny nick in them (some of the shamrocks in this post show the frayed edges), or your buttercream could be too soft or you’re using too much pressure. Feel it out, frayed edges or not, the shamrocks look fine.
- You can also skip the flower nail process all together, and pipe your shamrocks directly onto your cupcake or cake surface.
- For a 3-leaf shamrock, space your leaflets so you have one on each side and one at the top center. For a 4-leaf clover, add a fourth at the bottom and space them out a bit more evenly.
Happy decorating!