Looking for St. Patrick’s Day cupcakes that’s festive but still a little fancy? These elegant green cupcakes are the perfect mix of fun and sophistication! With dreamy shades of green buttercream, gold accents, and buttercream shamrocks, they’re a step up from your usual holiday desserts, and they’re totally beginner-friendly.
You don’t need pro-level skills to pull these off! I’ll walk you through the piping tips and simple techniques I used to achieve these looks. Plus, if you prefer to see it all in action, check out my real-time ASMR decorating video for a relaxing, step-by-step visual guide.
JUMP TO
What You’ll Need
- Piping tips:
- Wilton 2D
- Wilton 1M
- Wilton 4B
- Wilton 104
- Buttercream; see note below.
- Gel food colors; I used Satin Ice
- Gold accents (sprinkles, edible gold)
- Cupcakes of your choice
St. Patrick’s Day Cupcakes Color Palette
The colors I used for these cupcakes were white, emerald green, and sage green. Here’s how I mixed them:
- White – A touch of white gel color mixed into natural buttercream for a clean, bright finish.
- Sage Green – A blend of bright green, vert green, and white. I added a hint of olive green to slightly desaturate the mix.
- Emerald Green – I built this from the sage green base, adjusting the tone with blue and additional vert green.
Feel free to adjust these ratios as you create your own perfect shades!
For the gold accents and shamrocks: I used a gold sprinkle mix from Michaels, enhanced with edible gold dust for extra sparkle. For the painted details, I mixed gold dust with a small amount of vanilla extract to create a metallic paint for the shamrocks.
The shamrocks themselves were piped using bright green with a touch of olive green, just enough to temper the brightness while maintaining vibrant appeal.
What Buttercream Did I Use?
For these St. Patrick’s Day cupcakes, I used a mix of Faux Meringue Buttercream (IMBC) and American Buttercream (ABC). I had some leftovers of both and decided to combine them, and honestly, it worked out beautifully! The result was a buttercream that had the silky smoothness of IMBC but with a bit more stability from the ABC.
Since I didn’t follow a specific recipe for this mix, you can use either buttercream on its own, or try blending them if you ever have leftovers like I did. If you love the richness of IMBC but want a little more structure, this accidental mix might be something worth experimenting with!
Piping Techniques For St. Patrick’s Day Cupcakes
Don’t let the intricate appearance fool you, these cupcakes are absolutely achievable for beginners! Here’s why:
- I used four basic Wilton piping tips (1M, 2D, 4B, and 104) that are affordable and widely available
- Each design builds on simple piping movements that anyone can master with a little practice
- The variations come from changing tips and angles, not from complicated techniques
- My real-time YouTube video shows you each motion at a pace that’s easy to follow
- Mistakes are easily covered with additional piping, gold sprinkles, or other added accents
- The multi-toned green effect looks complex but is achieved through simple color mixing
Even if you’re new to buttercream piping, you can start with simple rosettes and gradually incorporate more intricate details as your confidence grows.
The beauty of these designs is their forgiving nature and endless customization possibilities. Trust your instincts, follow whatever movement feels right in the moment and experiment freely with different piping tips to discover your signature style.


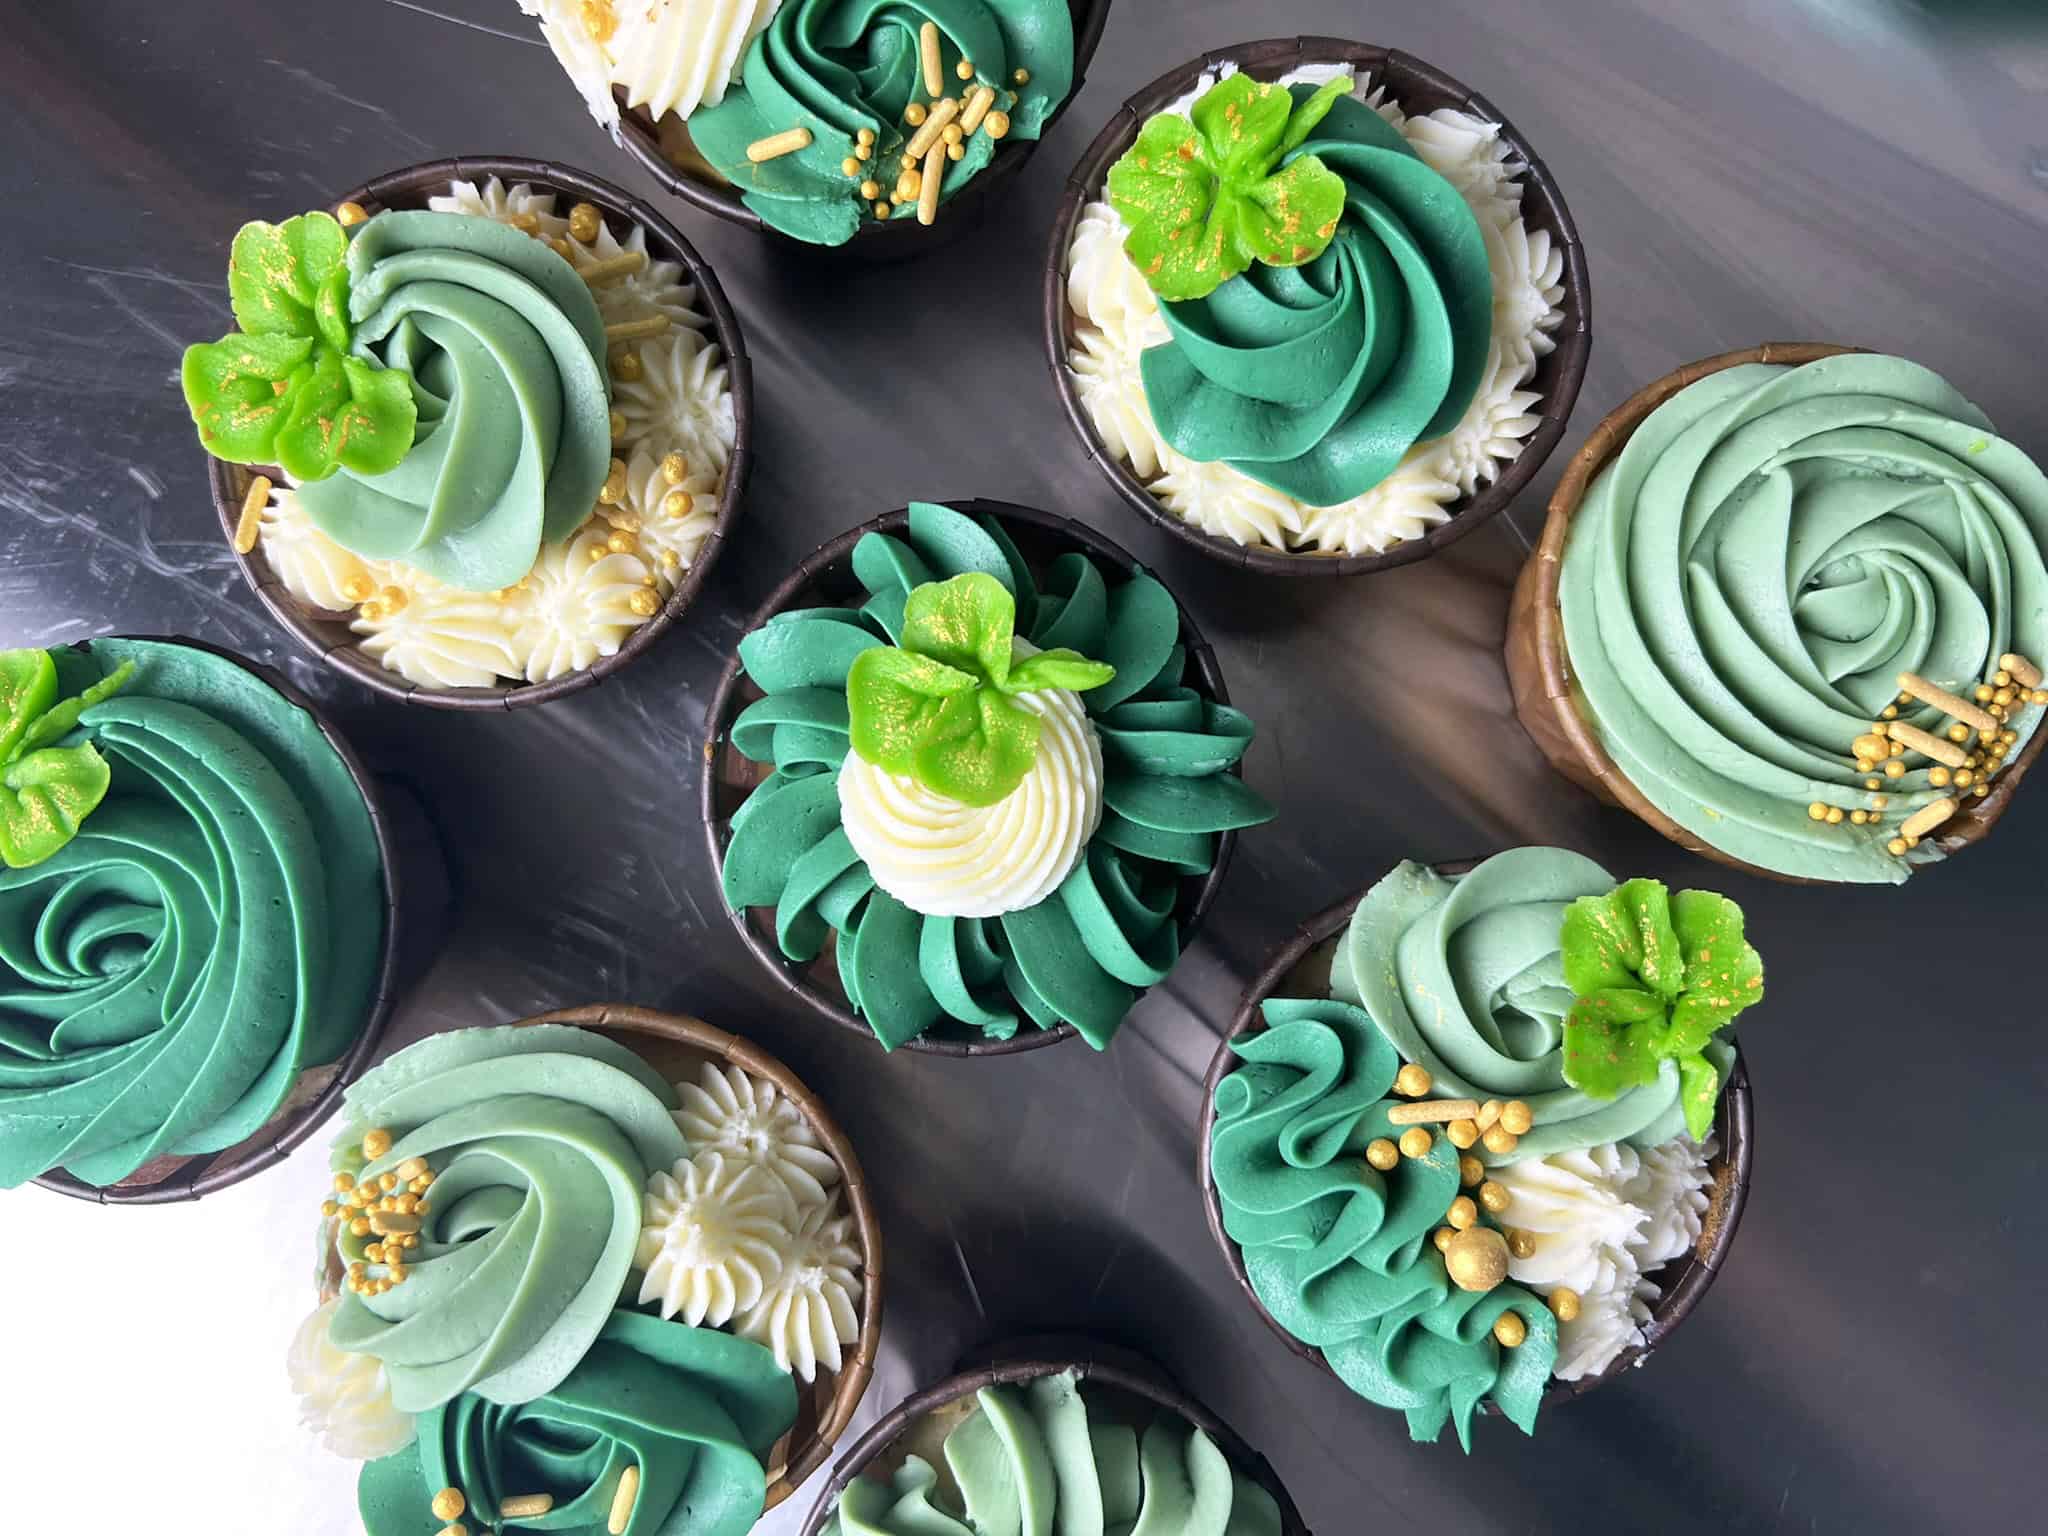
Every cupcake in this collection is a different combination of the same four tips: the 1M, 2D, 4B, and 104. Swapping tips, layering colors, and changing the order of elements is really all it takes to get seven completely different looks. The photos above have each tip labeled so you can see exactly what was used where, and the YouTube video shows the motions in real time if you want to follow along.
- Base Swirls: Wilton 1M (large open star), 2D (large drop flower), and 4B (large open star) tips create smooth, elegant swirls that serve as the foundation of each design.
- Texture Elements: Wilton 4B adds dimension with mini rosettes, drop stars, and piped dots, creating depth and contrast.
- Accent Details: Shamrocks piped with Wilton 104 (petal/leaf) tip provide a festive touch. Pipe them yourself with my step-by-step tutorial, here.
- Finishing Touches: Gold sprinkles are strategically placed to complement the green tones and add a touch of elegance.
Helpful Tips & Notes
- Consistency is key: Your buttercream should be medium-firm but remain soft enough to pipe smoothly but firm enough to hold its shape (in the YT video, the white buttercream was too stiff)
- Color gradually: Start with a lighter shade of green and gradually add more color to achieve the perfect hue
- Practice first: Try a few practice swirls on parchment paper (or other surface) before piping directly onto cupcakes
- Temperature matters: Work with room-temperature buttercream for the smoothest piping experience
- Pressure control: Maintain even pressure for consistent results
- Piping bags: Use 12-16 inch bags for more control and less hand fatigue
- Set Buttercream Before Painting: Allow your buttercream to set at room temperature for 10–30 minutes before applying gold accents. This is most effective with American Buttercream, as it forms a light crust, making it easier to paint without smudging.
Final Thoughts
A few basic piping tips and some simple color mixing goes a long way. I hope these give you a starting point to play with and make your own. If you give them a try, I’d love to see how they turn out! Tag me on Instagram @alchemy.sweets or leave a photo in the comments below.
Happy decorating!